
At its most basic, a cell culture plate is a sterile, flat-bottomed dish with a series of wells, built to give your cells a home in the lab. It’s the stage where every biological experiment, from foundational research to drug discovery, begins.
Why Your Cell Culture Plate Is More Than Just Plastic
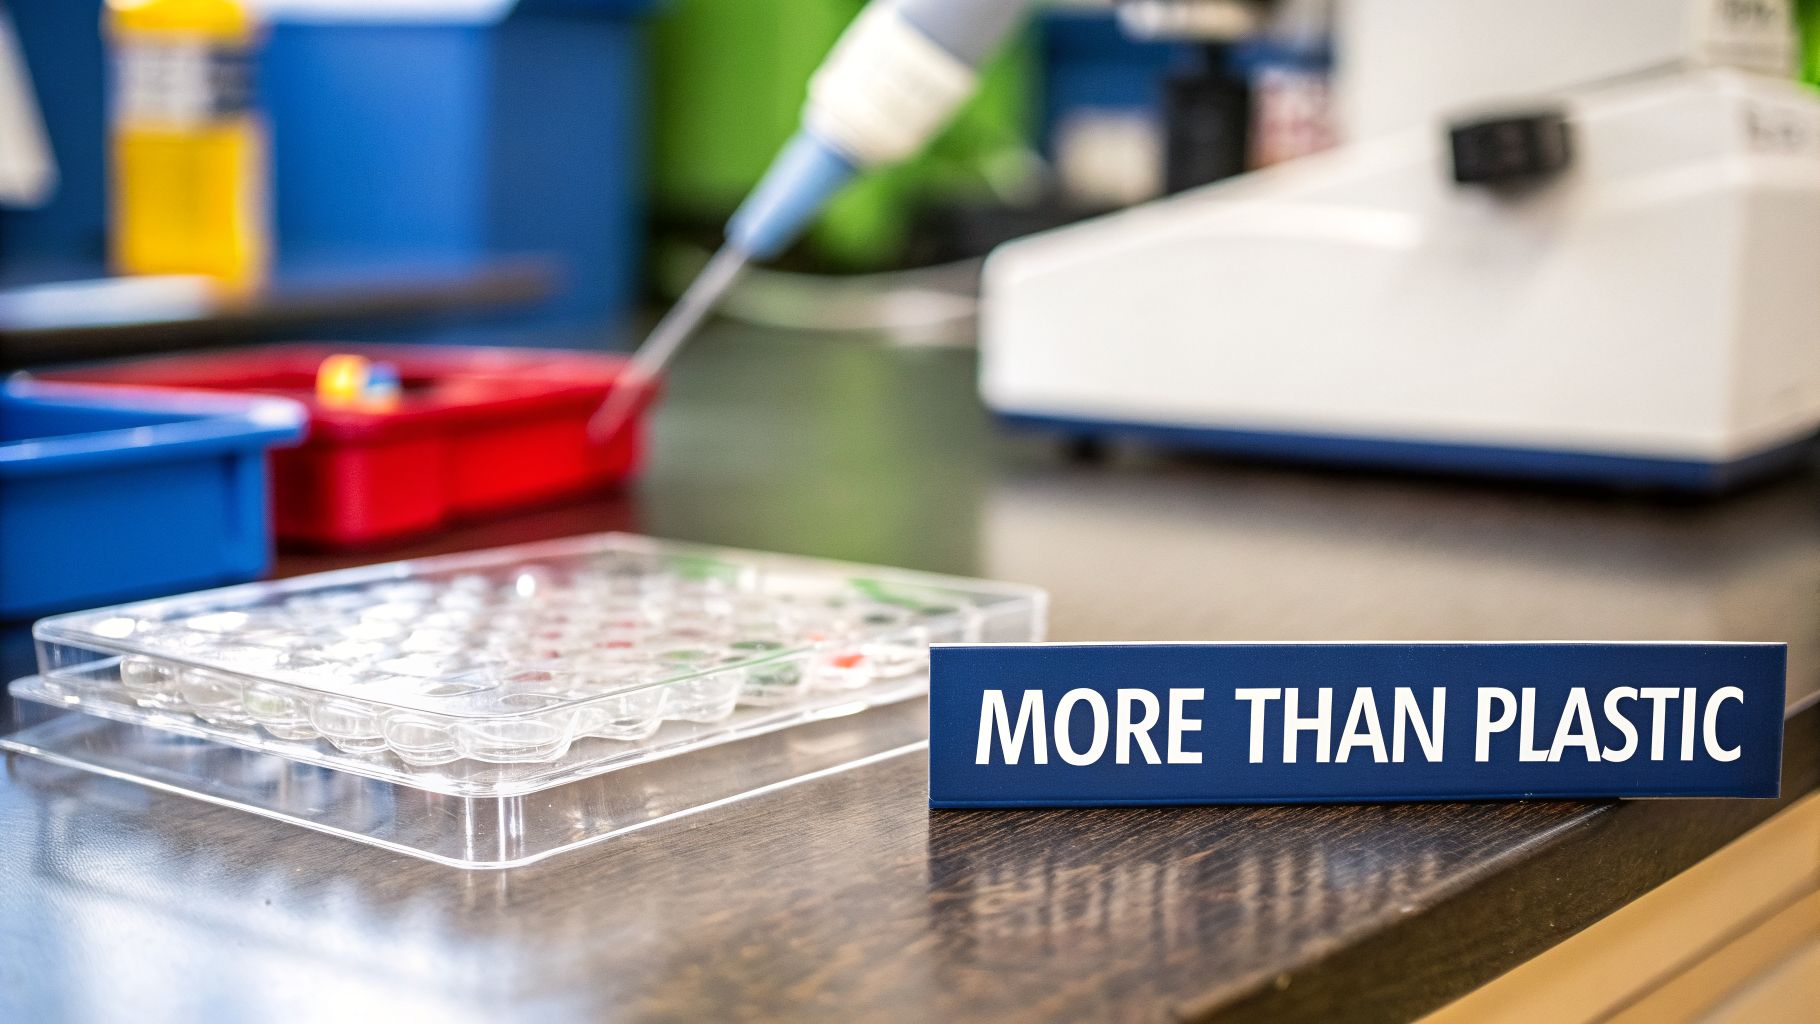
It’s easy to dismiss a cell culture plate as just another piece of plastic on the lab bench. In reality, it’s a carefully engineered habitat where your cells will either thrive or fail. The plate you choose has a direct, profound impact on cell health, the accuracy of your data, and the reproducibility of your work.
Think of it this way: your cells are designed to grow inside the complex, protein-rich architecture of a living organism—the extracellular matrix (ECM). A simple piece of raw plastic doesn’t come close to mimicking that. The right plate is designed to replicate that native environment, giving cells the physical and chemical cues they need to attach, grow, and behave as they would in vivo.
The Foundation of Experimental Success
Your choice of plate is not a minor detail; it’s a critical experimental variable. Choosing the wrong one can sabotage your research before it even begins, creating problems that can be a nightmare to troubleshoot.
These issues show up in a few classic ways:
- Poor Cell Attachment: Your cells simply refuse to stick, clumping up or floating in the media instead of forming a healthy monolayer.
- Altered Cell Behavior: An unsuitable surface can make cells change their shape, slow their growth, or even differentiate when you don’t want them to.
- Inconsistent Results: Unexplained variability between wells or plates makes your data messy, unreliable, and impossible to interpret with any confidence.
Choosing the right plate isn't about convenience; it’s about control. It’s about ensuring the only variables in your experiment are the ones you introduce on purpose. That’s how you get clear, dependable outcomes.
Moving Beyond the Catalog Number
This guide is designed to demystify the selection process, moving you from just picking a catalog number to making a decision based on sound scientific reasoning. We'll get into how different materials, surface coatings, and well formats directly impact your research.
By understanding these fundamentals, you’ll be ready to make an informed choice for any experiment you run. This knowledge is your best defense against common failures, empowering you to troubleshoot effectively and set a clear path toward reliable, publication-ready data. Whether you're working with hardy cancer lines or fussy primary neurons, mastering plate selection is the first real step to success.
Choosing the Right Material and Surface Coating
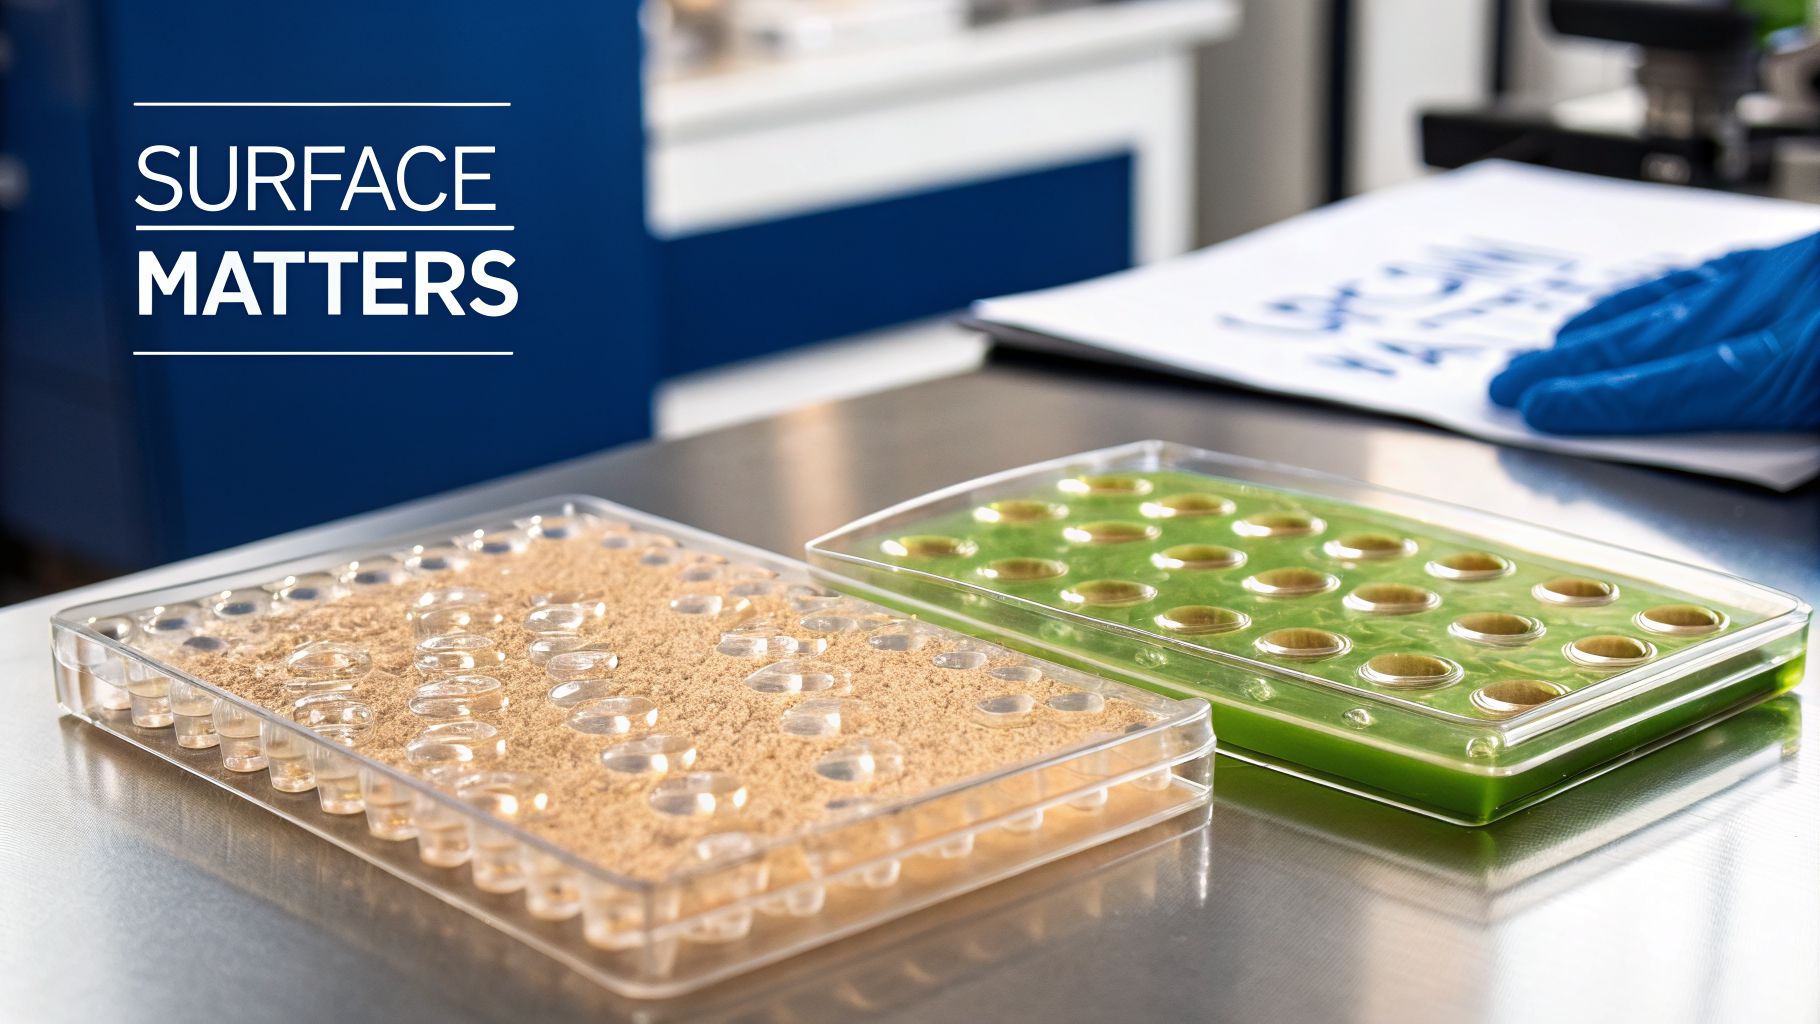
The surface your cells grow on can make or break your entire experiment. A cell culture plate is far more than just a plastic container; it's a carefully engineered environment meant to replicate the complex world inside the body. Get the material and surface coating right, and your cells will thrive. Get it wrong, and you'll be troubleshooting disappointing data for weeks.
The workhorse of almost every cell culture lab is polystyrene. There’s a good reason for this. It’s affordable, disposable, and, most importantly, boasts fantastic optical clarity. This is a non-negotiable feature that lets you peer through a microscope and see your cells clearly without any distortion.
But there’s a catch. Raw, untreated polystyrene is hydrophobic—it repels water. For most cells, trying to attach to this surface is like trying to get a grip on an oiled-up floor. It just doesn’t work. This is where surface treatment becomes one of the most critical decisions you'll make.
Standard Versus Specialized Surfaces
The most common surface you'll come across is the standard tissue culture (TC)-treated plate. This process zaps the polystyrene to make it more hydrophilic, introducing a negative charge. This simple change gives a huge range of common adherent cells—think fibroblasts and epithelial lines—the "grip" they need to attach, spread out, and form a healthy, happy monolayer.
A good way to think about it is like cookware:
- Non-Treated Surface: This is your non-stick Teflon pan. It’s perfect when you don't want cells to attach. Use it for suspension cells (like many blood cell lines) or for growing 3D spheroids that need to float and self-assemble.
- TC-Treated Surface: This is your trusty, seasoned cast-iron skillet. It’s a reliable and versatile go-to that gives most everyday cell lines just enough texture to anchor themselves and grow properly.
For routine work with robust, well-established cell lines, a standard TC-treated plate is often all you need. But when your cells are more sensitive or specialized, it's time to move beyond the basics.
Advanced Coatings for Picky Cells
Some cells are just plain picky. Primary cells taken directly from tissue, stem cells, and neurons often need specific biochemical signals from their surroundings to behave correctly. This is where advanced surface coatings, which mimic the natural extracellular matrix (ECM), become indispensable.
The entire point of an advanced coating is to trick your cells into thinking they’re back in their native biological neighborhood. By providing the right protein attachment points, these surfaces support not just adhesion, but also proper function, differentiation, and survival.
These coatings can come pre-applied from the manufacturer or be added in the lab just before an experiment. Some of the most common options include:
- Poly-D-Lysine (PDL): This synthetic polymer creates a uniform, positively charged layer. It's a fantastic choice for promoting the attachment of negatively charged cells, making it the default for primary neurons and many transfected cell lines.
- Collagen: As the most abundant protein in the body, collagen provides a natural scaffold that many cells recognize. It’s particularly effective for endothelial cells, hepatocytes, and muscle cells, helping them attach firmly and maintain their proper shape.
- Fibronectin: A key player in the ECM, this glycoprotein is crucial for cell adhesion and migration. Scientists often turn to fibronectin for difficult-to-culture cells, like mesenchymal stem cells (MSCs), that refuse to stick to standard TC-treated surfaces.
- Laminin: Essential for neural development, laminin is the premier coating for many types of neurons and stem cells. It actively helps guide neurite outgrowth and supports the intricate structures needed for neurological research.
Choosing the right coating isn’t a guessing game. It’s about matching the surface to the biological needs of your cells. Before you start, do a quick literature search to see what surfaces other scientists have successfully used for your cell type. That simple step can save you countless hours of troubleshooting and make sure your cells feel at home from day one.
Matching Plate Format to Your Experimental Design
Choosing the right cell culture plate isn't just about how many samples you want to run. It's a foundational decision that dictates the scale, scope, and even the outcome of your entire experiment. Think of it as choosing the right tool for the job. You wouldn't use a delicate watchmaker's screwdriver on a massive engine bolt, and you certainly wouldn't bring a sledgehammer to repair a microchip.
The plate format determines everything: the volume of media you use, the number of cells you can harvest, and the kinds of analysis you can even attempt. It directly impacts your ability to collect enough material for downstream work, whether that’s detailed microscopy or a massive screening campaign.
Lower Density Plates for In-Depth Analysis
For most day-to-day lab work, lower-density plates are your trusted companions. These classic formats strike the perfect balance between getting enough cells to work with and running a reasonable number of replicates or conditions.
Think of these as individual workbenches, giving you plenty of space to focus on each sample.
- 6-Well Plates: These are your heavy lifters. When you need a large cell pellet or a high volume of lysate for techniques like Western blotting or immunoprecipitation, the large surface area of a 6-well plate delivers the high cell yield you need.
- 12-Well Plates: A fantastic middle ground, 12-well plates give you enough cells for many molecular assays while letting you test more conditions or replicates than a 6-well plate allows.
- 24-Well Plates: Perfect for when you need to scale up your conditions. These are the go-to for building out dose-response curves, running cell-based assays, and making detailed morphological observations where you're comparing multiple treatments side-by-side.
These formats are built for experiments where the quality and quantity of material from each well are more important than the sheer number of samples. They make handling, media changes, and imaging straightforward and manageable.
High-Density Plates for High-Throughput Screening
When the goal is to test hundreds—or thousands—of compounds, the rules change entirely. This is the world of high-throughput screening (HTS), where automation, miniaturization, and raw efficiency are king. For this, you need a completely different class of plate.
These plates are less like a workshop and more like a massive, robotic assembly line. The global market reflects this demand, with the cell culture plates market value climbing from $2.29 billion in 2025 to an estimated $2.44 billion in 2026, fueled by a 6.2% compound annual growth rate. Standard 96-well plates, used in an estimated 70% of assays, are a massive driver of this growth, helping labs everywhere accelerate discovery. You can dive deeper into the full market analysis on cell culture plate trends and growth to understand the landscape.
Key high-density formats include:
- 96-Well Plates: The undisputed workhorse of HTS. 96-well plates are the standard for everything from ELISA assays and drug screening to cytotoxicity tests. Their design is perfectly matched to multichannel pipettes and automated liquid handlers, dramatically accelerating workflows.
- 384- and 1536-Well Plates: When you’re screening on a massive scale, these ultra-high-density formats are essential. They slash reagent costs and make it feasible to test enormous compound libraries, a critical capability in pharmaceutical drug discovery.
Choosing between these low- and high-density formats is one of the first and most critical decisions in your experimental design.
To make this choice easier, here's a quick guide matching common plate formats to their best-fit applications.
Choosing the Right Cell Culture Plate Format
| Plate Format (Wells) | Primary Application | Typical Volume per Well | Key Consideration |
|---|---|---|---|
| 6-Well | Large-scale cell expansion, Western blotting, protein/DNA extraction | 2-3 mL | Maximizes cell yield per sample. |
| 12-Well | General-purpose assays, moderate-scale cell collection | 1-2 mL | Good balance between cell number and replicate count. |
| 24-Well | Dose-response curves, cell-based reporter assays, microscopy | 0.5-1 mL | Ideal for comparing multiple conditions or treatments. |
| 96-Well | High-throughput screening (HTS), ELISAs, cytotoxicity assays | 100-200 µL | Standard for automation and multichannel pipetting. |
| 384/1536-Well | Ultra-high-throughput screening (uHTS), compound library screening | 25-80 µL (384) / 5-10 µL (1536) | Minimizes reagent cost for massive-scale experiments. |
This table provides a solid starting point, but always remember to cross-reference your specific cell type's seeding density and your assay's volume requirements before making a final decision.
Why Well Shape Matters
Beyond the number of wells, the shape of the well bottom is a critical—and often overlooked—design feature that can make or break an experiment.
The bottom of the well isn't just a container; it's an active participant in your experiment. Its geometry can help cells form specific structures or ensure you recover every last bit of your sample.
Here’s how to choose the right shape for your work:
| Well Shape | Primary Use Case | Why It Works |
|---|---|---|
| Flat-Bottom | Standard 2D cell culture, microscopy, and optical measurements. | Provides a single focal plane for clear imaging and a consistent light path for absorbance readers. It's the default for most adherent cell work. |
| Round-Bottom (U-Bottom) | Growing 3D spheroids, suspension cultures, and assays requiring cell-to-cell contact. | Prevents cells from attaching to the edges and encourages them to aggregate in the center, promoting the formation of tight spheroids or clusters. |
| V-Bottom (Conical) | Assays requiring complete sample recovery, such as agglutination assays or centrifugation steps. | The conical shape funnels all cells and precipitates into a single point, making it easy to pellet cells and aspirate supernatants without loss. |
By carefully matching the well count and well shape to your scientific question, you set the stage for accurate, reproducible results. This simple, thoughtful choice ensures your experimental design is solid from the very first step.
From Theory to Bench: How to Select the Perfect Plate
All the theory in the world about plate materials and formats won't save your experiment if you grab the wrong plastic off the shelf. This is where the rubber meets the road. Picking the right cell culture plate isn't some abstract exercise; it's a critical decision that directly dictates whether your experiment succeeds or fails. Let's walk through how to make that choice by starting with your final goal and working backward.
This isn't a trivial decision. Consumables like plates, media, and sera made up a staggering 59.20% of the entire cell culture market revenue in 2025. That dominance is fueled by the massive demand for these products in fields like monoclonal antibody production, where the right plates are essential for those initial screening steps. You can dive deeper into the numbers with these global cell culture market trends and reports.
Scenario-Based Plate Selection
The best way to get this right is to think through a few real-world lab scenarios. Let's take two common experimental setups and break down the logic for choosing a plate.
Scenario 1: You're growing sensitive primary neurons for high-resolution imaging.
Your main objective is to visualize delicate neurite outgrowths, which means optical quality is everything. These cells are also notoriously picky and will simply refuse to attach to a standard TC-treated surface.
- Cell Type Needs: Primary neurons demand a surface that feels like their natural home. A Poly-D-Lysine (PDL) or Laminin coating isn't a "nice-to-have"—it's a non-negotiable for getting them to attach and extend healthy neurites.
- Experimental Goal: High-resolution microscopy requires a plate with exceptional optical properties. A normal polystyrene plate will scatter light and give you distorted, fuzzy images.
- The Verdict: The only real choice here is a glass-bottom or polymer-bottom imaging plate with a PDL or Laminin coating. The glass gives you the crystal clarity needed for crisp images, while the coating makes sure your neurons will actually stick around to be imaged.
Scenario 2: You're running a high-throughput drug screen on a suspension cell line.
Here, your goals are efficiency and massive scale. You need to test hundreds of compounds on cells that grow floating in the media, and you absolutely cannot have them sticking to the plastic.
- Cell Type Needs: Suspension cells must not adhere to the plate surface. Any sticking is a failed experiment.
- Experimental Goal: High-throughput screening screams for a multi-well format to cram in as many tests as possible while using minimal reagents. Your assay also likely involves a centrifugation step to pellet the cells.
- The Verdict: An untreated, round-bottom (U-bottom) 384-well plate is the perfect tool for the job. The non-treated surface prevents any cell attachment, the 384-well format is built for automation and scale, and the U-bottom shape helps the cells form a neat little pellet for analysis after you spin them down.
This decision tree helps visualize how your core objective—whether it's a specific assay, an analysis method, or a 3D culture—should be the first thing you think about when reaching for a plate.

The flowchart makes it clear: start with what you need to accomplish, and the right plate format will follow.
Mitigating the Dreaded Edge Effect
Even with the perfect plate, you can still run into frustrating problems. The most notorious of these is the "edge effect," where cells in the outer wells of a plate—especially a 96-well—behave differently than those in the center simply because the media evaporates faster.
The edge effect is a data killer. It introduces a systematic error that can completely skew your results, making it look like your drug had an effect when all you're really measuring is a difference in humidity.
Fortunately, managing this is pretty straightforward. The most common fix is to create a simple humidity moat.
- Leave the entire outer ring of wells empty of cells. Don't use them for your experiment.
- Fill these sacrificial wells with sterile water or phosphate-buffered saline (PBS).
- Proceed with your experiment, seeding your cells only in the inner 60 wells.
This simple buffer zone creates a high-humidity microenvironment around your experimental wells. It dramatically slows evaporation from the wells that matter (from B2 to G11), giving you far more consistent and reliable data across the plate. By combining smart plate selection with good lab practice, you build a robust system for generating results you can actually trust.
Mastering Aseptic Technique for Contamination-Free Results
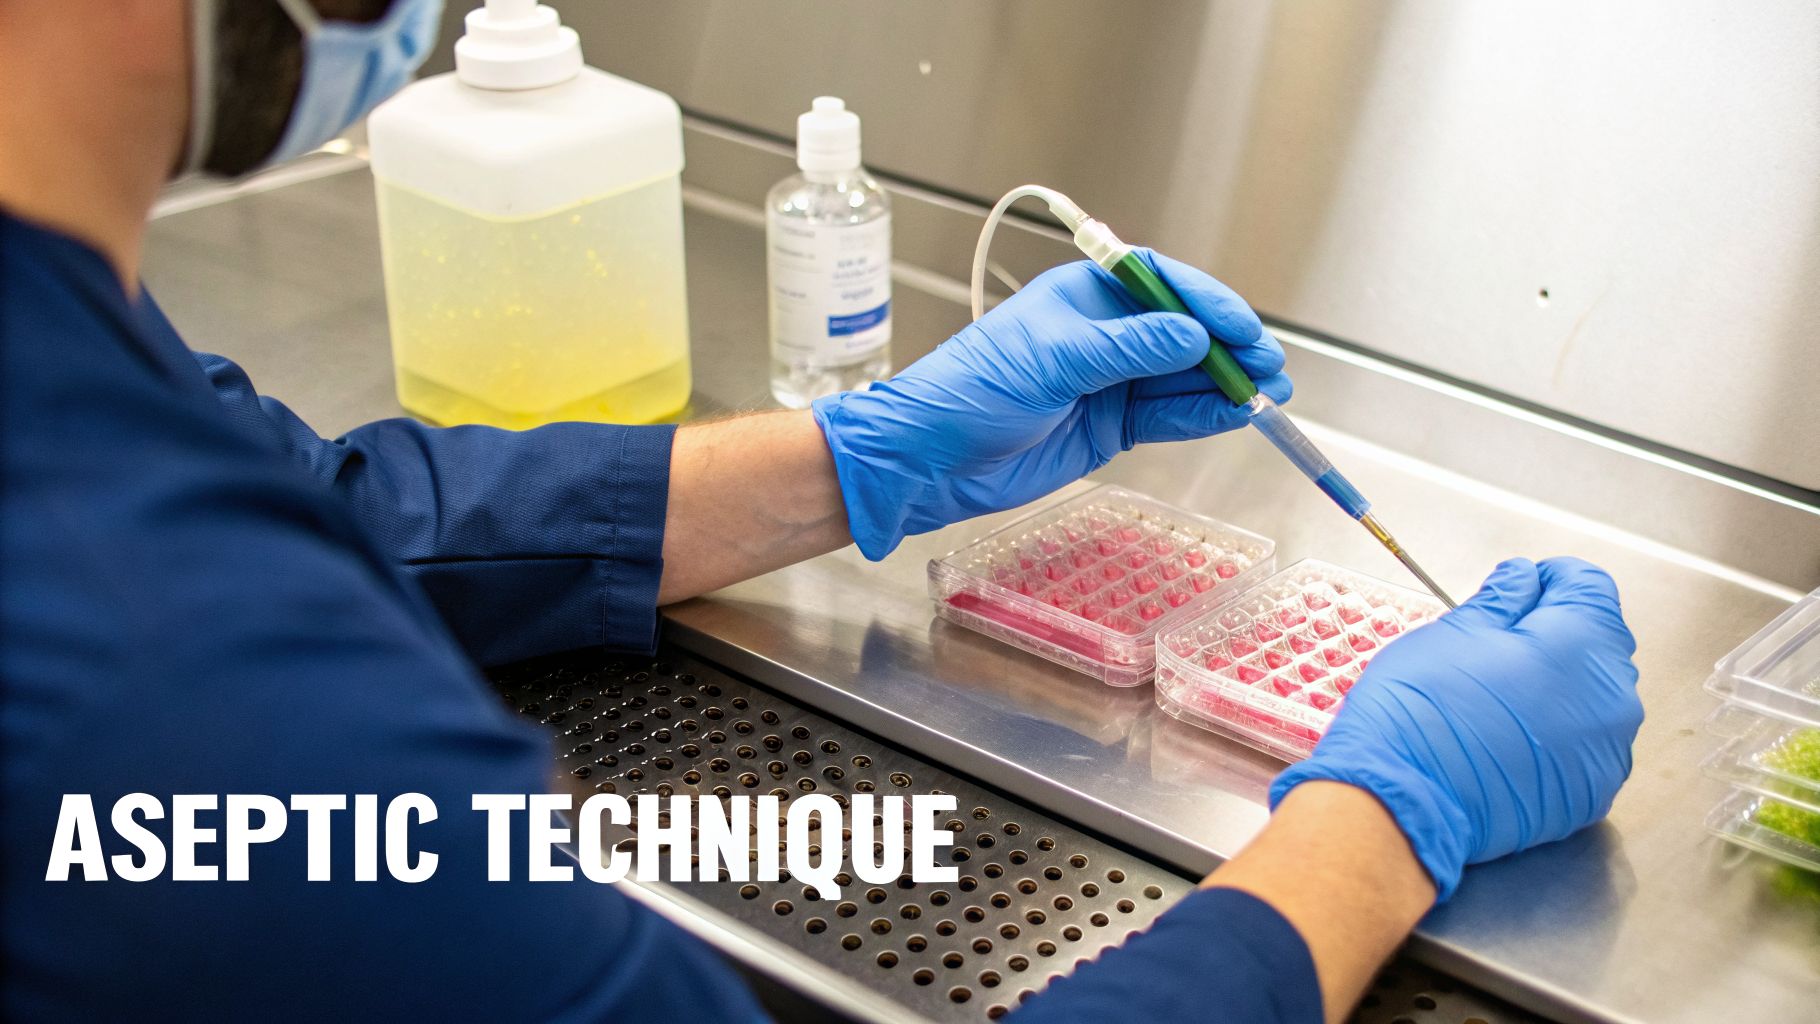
You can have the most perfectly chosen cell culture plate and the highest-grade media, but a single contamination event renders it all worthless. Aseptic technique isn’t a friendly suggestion; it is the absolute bedrock of successful cell culture.
This is the active, disciplined practice that shields your precious cells from the invisible army of bacteria, fungi, and mycoplasma waiting to invade. Think of your biosafety cabinet (BSC) as a sterile sanctuary. Your technique is the gatekeeper, and every move you make can either protect that sanctuary or burn it to the ground.
This is your first, last, and most important line of defense. It ensures the only thing growing in your wells are the cells you intend to grow.
Your Biosafety Cabinet Workflow: The Foundation
Success—or failure—begins the moment you approach the BSC. A disciplined workflow isn't just about being neat; it's about actively managing airflow to maintain a sterile field. Rushing these steps is a direct invitation for contamination.
First, decontaminate the entire work surface with 70% ethanol, letting it evaporate completely. Arrange your sterile items—media, pipettes, and your cell culture plate—inside the cabinet. Be strategic. Leave clear channels for air to circulate and never, ever block the front or rear grilles. This disrupts the protective air curtain and destroys the sterile field.
Critical Do's and Don'ts of Plate Handling
Once you're inside the hood, every single movement counts. Bad habits creep in easily and are the number one cause of contamination in most labs. These aren't just tips; they are the non-negotiable rules for keeping your plates clean.
Essential Do's:
- Work Within the Safe Zone: Keep all manipulations at least six inches inside the cabinet. This ensures your work stays within the cleanest, most consistent airflow.
- Open Packaging with Care: When opening sterile plates or pipettes, peel the packaging apart. Never punch through it, and don't let your gloves touch the sterile inner surfaces.
- Lift Lids Vertically: When opening a plate, lift the lid straight up just high enough to get your pipette in. This minimizes the time your wells are exposed to open air.
- Handle Lids Correctly: If you absolutely must put a lid down, place it on the sterile work surface with the inner side facing up. Never place it face-down.
Common Don'ts:
- Never Stack Plates in the Incubator: Stacking creates temperature gradients. The plates on the top and bottom of the stack will experience different temperatures, leading to inconsistent growth and unreliable data.
- Avoid Dragging Across Surfaces: Don't drag plates or flasks across the BSC surface. Always lift and place. Dragging can cause microscopic tears that introduce contaminants.
- Keep Your Hands Out: Your hands and arms are major sources of contamination. Minimize any movement over your open plates and media.
Aseptic technique is a mindset. It is the conscious, deliberate practice of anticipating contamination risks and actively preventing them. It’s the difference between reproducible data and weeks of wasted effort.
The modern cell culture plate is the cornerstone of a global market that has exploded from $4.83 billion in 2025 to a projected $5.36 billion in 2026. We’ve come a long way since Ross Harrison's pioneering nerve cell cultures in the 1960s. Today’s advanced polystyrene plates with treated surfaces achieve 95% cell attachment, giving researchers in hospitals and academic labs unprecedented consistency. You can learn more about the evolution of the cell culture vessel market and its impact on modern science.
By mastering these fundamental sterile practices, you ensure your advanced plates, media, and reagents can actually do their jobs, protecting the integrity of your experiments one plate at a time.
Troubleshooting Common Plate-Related Problems
Even the most meticulous scientist hits a wall. You walk into the lab, lean over the microscope, and there it is: your cells are clumped, the data is all over the place, or worst of all, you spot contamination. When an experiment derails, the cell culture plate itself is an often-overlooked but absolutely critical variable.
This is your guide for getting things back on track. We'll walk through the most common plate-related headaches, identify the likely culprits tied to your plates and your technique, and give you clear, actionable fixes.
Problem One: Cells Refuse to Attach or Are Clumping
It’s one of the most common sights in cell culture—poor attachment. Instead of a healthy, even monolayer, your cells are floating aimlessly or huddling together in sad little clumps. This is a five-alarm fire that your cells are stressed and hate their environment.
Before you start blaming the media or the cells themselves, take a hard look at your plate. Several factors could be the real problem:
- Wrong Surface Treatment: You might be using a non-treated (hydrophobic) plate for adherent cells that desperately need a TC-treated (hydrophilic) surface. It’s like asking a rock climber to scale a wall of ice with their bare hands—there’s simply no grip.
- Incorrect Advanced Coating: For finicky cells like primary neurons or stem cells, a standard TC-treated surface just won't cut it. They often need a specific protein coating like Poly-D-Lysine or Collagen to get the right biochemical signals for attachment.
- Expired or Improperly Stored Plates: Plastic surfaces aren't immortal. They degrade over time, especially if they’ve been sitting in direct sunlight or in a room with wild temperature swings. An expired plate might have lost its surface charge, making the treatment completely useless.
The Fix: Always, always double-check that your plate's surface treatment is the right match for your cell type's needs. For picky cells, a quick literature search is your best friend to confirm the right advanced coating. If you think the plates themselves are the issue, grab a fresh, unexpired sleeve and see if the problem disappears.
Problem Two: Inconsistent Results and the Edge Effect
You’ve just run a 96-well plate assay, and the results make no sense. The data from the wells on the outside of the plate looks drastically different from the wells in the middle. This isn't random noise; it's a systematic error that can tank your entire experiment. Welcome to the classic "edge effect."
The cause is almost always faster media evaporation in the perimeter wells.
The edge effect is a silent data killer. It introduces variability that has nothing to do with your experimental variables, making it seem like your outer-well cells responded differently when they were just drier.
The Fix: Thankfully, the solution is both simple and incredibly effective. You just need to create a humidity buffer by sacrificing the outer ring of wells.
- Isolate Your Experiment: Only seed your cells and run your experiment in the 60 inner wells of a 96-well plate.
- Create a Moat: Fill the 36 surrounding perimeter wells with a sterile liquid—phosphate-buffered saline (PBS) or sterile water works perfectly.
This "moat" creates a stable, humid microenvironment that massively slows down evaporation from your precious experimental wells. The result is consistent, reliable data from well B2 all the way to G11.
Problem Three: Suspected Cross-Contamination Between Wells
You’re analyzing your plate and your heart sinks. There’s unexpected growth in a negative control well, or the results suggest one treatment somehow "bled" over into another. This points directly to cross-contamination, a deeply frustrating problem that almost always comes down to pipetting technique.
Even a single, invisible aerosol droplet can carry enough cells or potent compounds to ruin the results in an adjacent well. The risk is even higher in high-density formats where the wells are packed tightly together.
The Fix: It’s time to refine your pipetting with a few non-negotiable sterile practices.
- Change Tips Every Single Time: Use a fresh, sterile pipette tip for every different condition, reagent, or well. No exceptions. This is the cardinal rule.
- Pipette at an Angle: When you dispense liquid, gently touch the pipette tip to the side of the well wall. Avoid plunging the tip straight down into the media, which is a recipe for splashes and aerosols.
- Go Slow and Steady: Pipette deliberately and smoothly. This prevents bubbling and aerosol formation. When you pull the tip out, withdraw it straight up without bumping against other wells.
By learning to troubleshoot your cell culture plate and tightening up your technique, you can head off these common problems before they start, saving yourself valuable time and ensuring your results are accurate and trustworthy.
Frequently Asked Questions About Cell Culture Plates
When you're in the trenches of cell culture, a few fundamental questions about plates come up again and again. Here are the straight answers you need, cutting through the noise to help you get your lab practices right.
What Is the Real Difference Between TC-Treated and Non-Treated Plates?
Think of it as the difference between a rock-climbing wall and a greased slide. A non-treated cell culture plate is hydrophobic, a slippery surface that most cells simply can’t grab onto. This is exactly what you want for suspension cultures or for encouraging cells to form 3D spheroids.
A TC-treated plate, on the other hand, has been modified to be hydrophilic and hold a negative charge. This "treatment" gives adherent cells—which make up the vast majority of cell lines—the grip they need to attach, spread out, and form a healthy monolayer. Using the wrong plate is one of the most common and easily avoidable reasons an experiment fails right at the start.
Can I Ever Reuse a Cell Culture Plate?
Absolutely not. This isn't a matter of opinion; it's a hard rule of good lab practice. Cell culture plates are designed and sterilized for single use only.
Attempting to wash and reuse them is a recipe for disaster. You introduce massive, unacceptable risks:
- Chemical Residues: Even trace amounts of detergents or autoclave-induced byproducts can be toxic to your cells.
- Surface Degradation: Washing and heat will obliterate the delicate TC-treatment, meaning your adherent cells won't attach properly, if at all.
- Contamination: It is virtually impossible to re-sterilize a used plate to the standard required for cell culture. Contamination becomes a near certainty.
The tiny cost you might save by reusing a plate is nothing compared to the cost of a ruined experiment—weeks of your time and hundreds or thousands of dollars in reagents down the drain. Always use a fresh, sterile plate.
How Should I Store Unopened Plates to Maintain Sterility?
Proper storage is as critical as proper technique. Keep your unopened sleeves of plates in a clean, dry area away from direct sunlight. UV exposure will degrade the plastic and its surface treatment over time.
Most importantly, store them at a consistent room temperature. Big swings in temperature or humidity can compromise the sterile packaging and even warp the plastic itself. A warped plate won't sit flat on the microscope stage, affecting focus and imaging, and can lead to uneven media distribution. Treat your unopened plates like any other sensitive lab supply.
For all your research needs, PurMa Biologics offers a comprehensive portfolio of high-quality media, reagents, and services to ensure reliable, publication-ready results. Explore our solutions.