
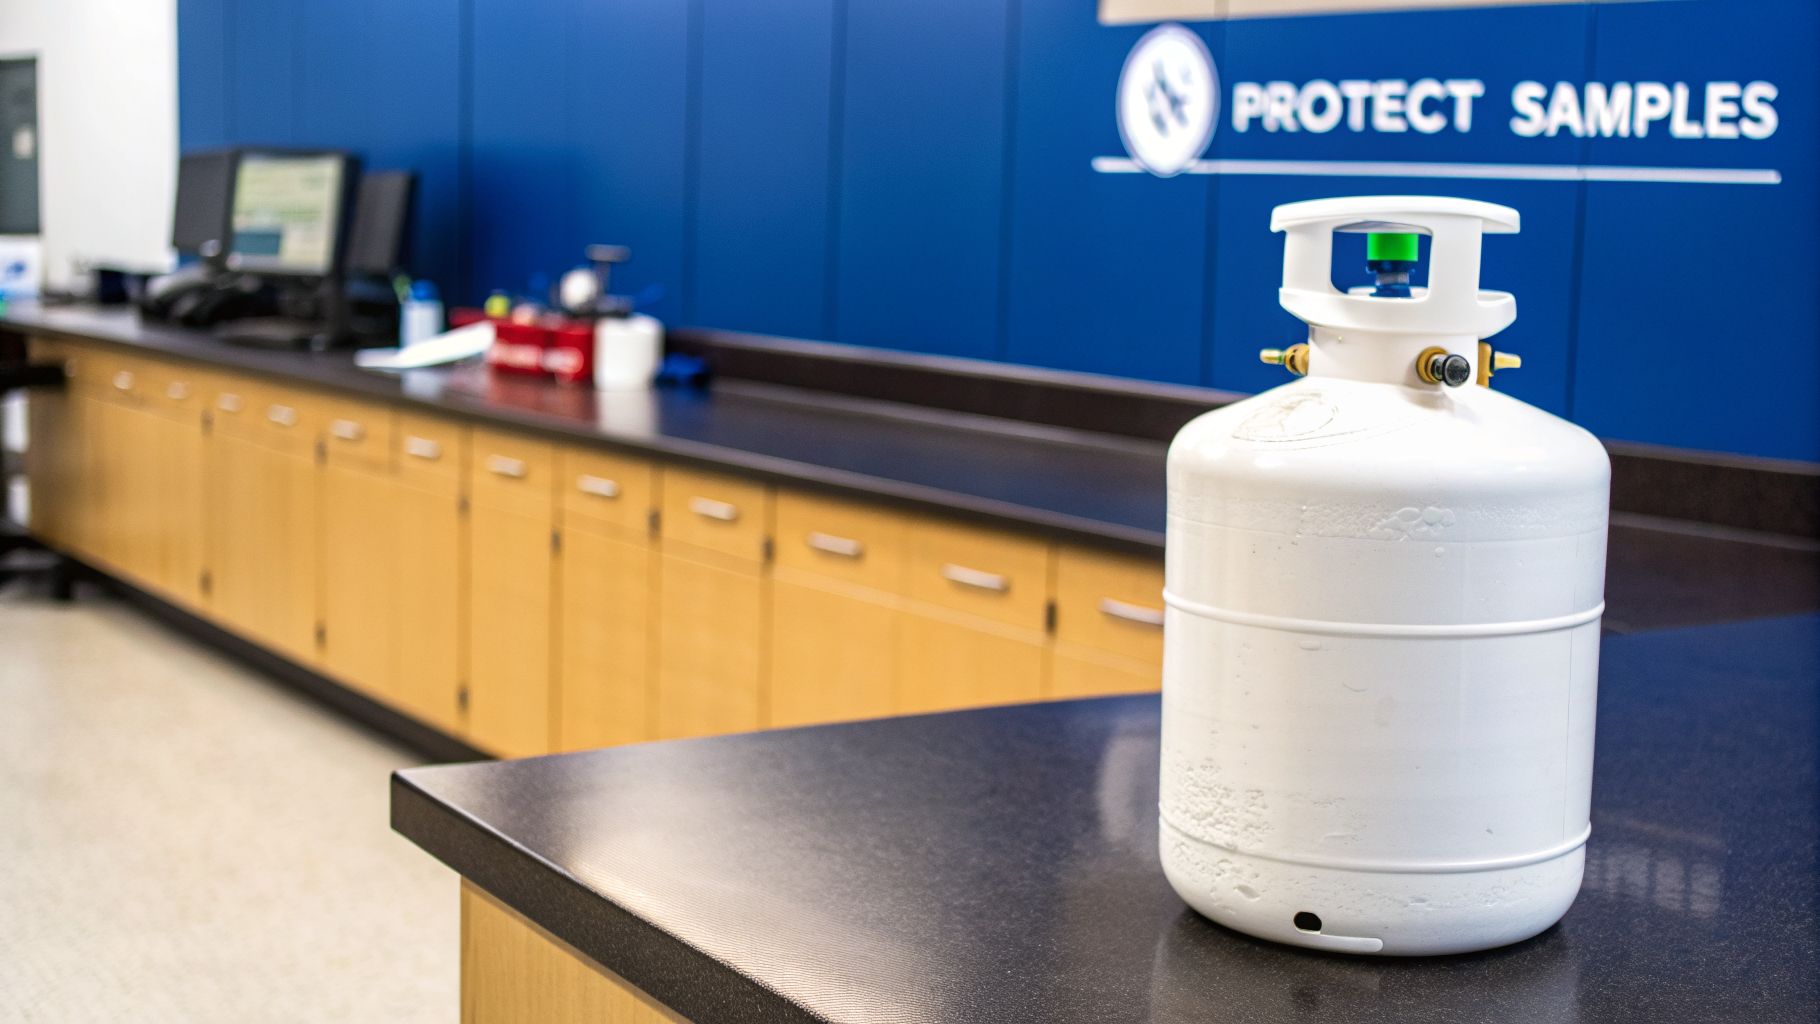
A liquid nitrogen dewar is a specialized, vacuum-insulated container designed to hold and transport liquid nitrogen (LN2) at its incredibly low temperature of -196°C (-320°F). You can think of it as a hyper-advanced thermos, but instead of keeping your coffee hot, its entire purpose is to keep cryogens cold to protect invaluable biological samples. These vessels are cornerstone tools in every modern lab, from academic research all the way to large-scale bioproduction.
Understanding the Liquid Nitrogen Dewar
Imagine for a moment that years of your research—irreplaceable cell lines, patient tissues, or meticulously engineered master cell banks—depend entirely on a single piece of equipment. In countless labs around the world, that critical job falls to the liquid nitrogen dewar. It's the unsung hero safeguarding the very foundation of your work by maintaining the extreme cold needed for cryopreservation.
Without this technology, long-term storage of sensitive biologicals would be flat-out impossible. The stable, frigid environment instantly halts all cellular activity, effectively putting your samples into a state of suspended animation. This ensures their biological integrity is locked in and preserved for future use, whether it's for the next experiment, cell culture expansion, or therapeutic development.
The Dewar's Role Across Scientific Settings
The need for a reliable liquid nitrogen dewar cuts across a huge spectrum of scientific and medical fields. This isn't a niche tool for one type of lab; it's a universal necessity for anyone working with materials that can't afford to thaw.
- Academic Research: University labs depend on dewars to store primary cells, engineered cell lines, and precious reagents for fundamental biological studies.
- Biomanufacturing: Companies producing biologics like monoclonal antibodies rely on large-scale cryogenic storage to maintain their master and working cell banks, which is non-negotiable for production consistency.
- Clinical and Hospital Labs: Dewars are essential for preserving patient samples, cord blood, and tissues for both diagnostics and future treatment options.
At its core, the job of a liquid nitrogen dewar is simple but profound: to create a stable, ultra-cold sanctuary that protects valuable biological assets from degradation. It is the first and most critical line of defense against catastrophic sample loss.
This guide will get straight to the point, cutting through the dense technical jargon to give you a clear understanding of everything from core principles to practical, actionable advice. We’ll cover how to pick the right dewar for your lab, use it safely, and keep it running properly, giving you the confidence to protect your most critical work.
How a Liquid Nitrogen Dewar Actually Works
The design behind a liquid nitrogen dewar is brilliantly simple, yet it’s engineered to perfection. It might look like a high-tech thermos, but the principles at play are fine-tuned to handle the extreme cold of -196°C. Its entire job boils down to one thing: stopping heat from the outside world from reaching the cryogen inside.
It does this with a "vessel-within-a-vessel" construction. You have an inner chamber that holds the liquid nitrogen, which is suspended inside a tough outer shell. The real magic happens in the space between those two walls.
The Power of a Vacuum
The single most critical feature is the vacuum-insulated gap between the inner and outer chambers. In this space, nearly all the air has been pumped out, creating an almost-perfect vacuum. Since heat needs a medium to travel through—what we call conduction and convection—this empty space is a powerful roadblock.
Think of it like the dead silence of outer space. Without air to carry sound waves, space is quiet. In the same way, a dewar’s vacuum has no air to carry heat, effectively isolating the cold inner vessel from the ambient temperature of your lab. This is the main reason a dewar can hold its ultra-low temperature for days, weeks, or even months.
Reflecting Heat and Minimizing Escape
The vacuum is the first line of defense, but other design elements are just as crucial. The inner surfaces of that vacuum space are highly reflective, like a mirror. This isn't for looks; it's to block another form of heat transfer: thermal radiation.
Just as a shiny car reflects sunlight on a hot day, these polished surfaces bounce thermal energy away, preventing it from ever reaching the liquid nitrogen.
The design of the neck tube is also deliberate. It's intentionally narrow because this opening is the main weak point where heat can still sneak in. Minimizing its diameter dramatically cuts down on heat transfer and slows the rate of nitrogen boil-off. It’s a smart trade-off between giving you access to your samples and maximizing thermal efficiency.
The core principle is a multi-layered defense against heat. The vacuum stops conduction, reflective surfaces block radiation, and a narrow neck minimizes the final entry point—all working together to keep samples safely in suspended animation.
This elegant combination of physics and engineering has a long history. The first vacuum-insulated vessel was invented by Sir James Dewar back in 1892, just nine years after nitrogen was first liquefied. His invention made it possible to store cryogens safely, paving the way for low-temperature physics and, eventually, the biological applications we rely on today, like preserving mammalian cells for bioproduction. You can explore the complete history of how this invention evolved from a simple glass flask to the modern lab staple we use every day.
Choosing the Right Dewar for Your Lab
Picking the right liquid nitrogen dewar isn't just an equipment purchase; it's a critical decision that directly impacts your lab's budget, workflow, and the long-term safety of your irreplaceable samples. They are not all the same. Each one is engineered for a specific job, and matching the right dewar to your daily lab reality is the first step toward operational success.
The global market for these specialized containers is expected to climb from USD 212.8 million in 2026 to USD 278.37 million by 2035. This isn't just abstract growth; it’s driven by the massive and expanding cryopreservation needs in bioproduction and mammalian cell culture. This surge highlights just how vital dewars have become in every setting, from academic research to large-scale biomanufacturing facilities managing thousands of liters of LN2 weekly. You can dive deeper into the history and modern usage of LN2 at major research centers like Oak Ridge National Laboratory.
Storage vs. Transport vs. Dispensing
The first question you have to answer is simple: What’s the primary job? Are you setting up a cell bank to archive samples for years? Do you need to shuttle vials between buildings? Or do you just need a small, on-demand supply of LN2 for daily experiments? Your answer immediately points you toward one of three main dewar categories.
This comparison table breaks down the three main types of liquid nitrogen dewars. Use it to quickly match your lab's primary needs—be it long-term archival, sample movement, or daily benchwork—to the right dewar category.
Liquid Nitrogen Dewar Selection Guide
| Dewar Type | Primary Use Case | Key Features | Ideal For |
|---|---|---|---|
| Storage Dewars | Long-term, static sample archival | Superior vacuum insulation, narrow neck, wide-mouth opening for sample access, maximized static holding time | Archiving master cell banks, long-term cryopreservation of valuable biological samples. |
| Transport Dewars | Moving samples between locations safely | Rugged construction, internal absorbent material to prevent spills, shorter holding times | Transporting samples between labs, buildings, or off-site facilities without compromising integrity. |
| Dispensing Dewars | Controlled, on-demand LN2 withdrawal | Pressurized vessel, built-in spigot or dispensing hose for easy pouring, mobile design | Daily lab tasks like flash-freezing, cooling equipment, and topping off smaller containers. |
Each dewar type is engineered with a specific purpose in mind. Choosing the right one from the start prevents costly workarounds and ensures your samples are handled correctly, whether they're sitting in storage for a decade or moving across campus.
The decision tree below gives you a visual path for this choice, making it clear how your lab's workflow dictates the type of dewar you need.
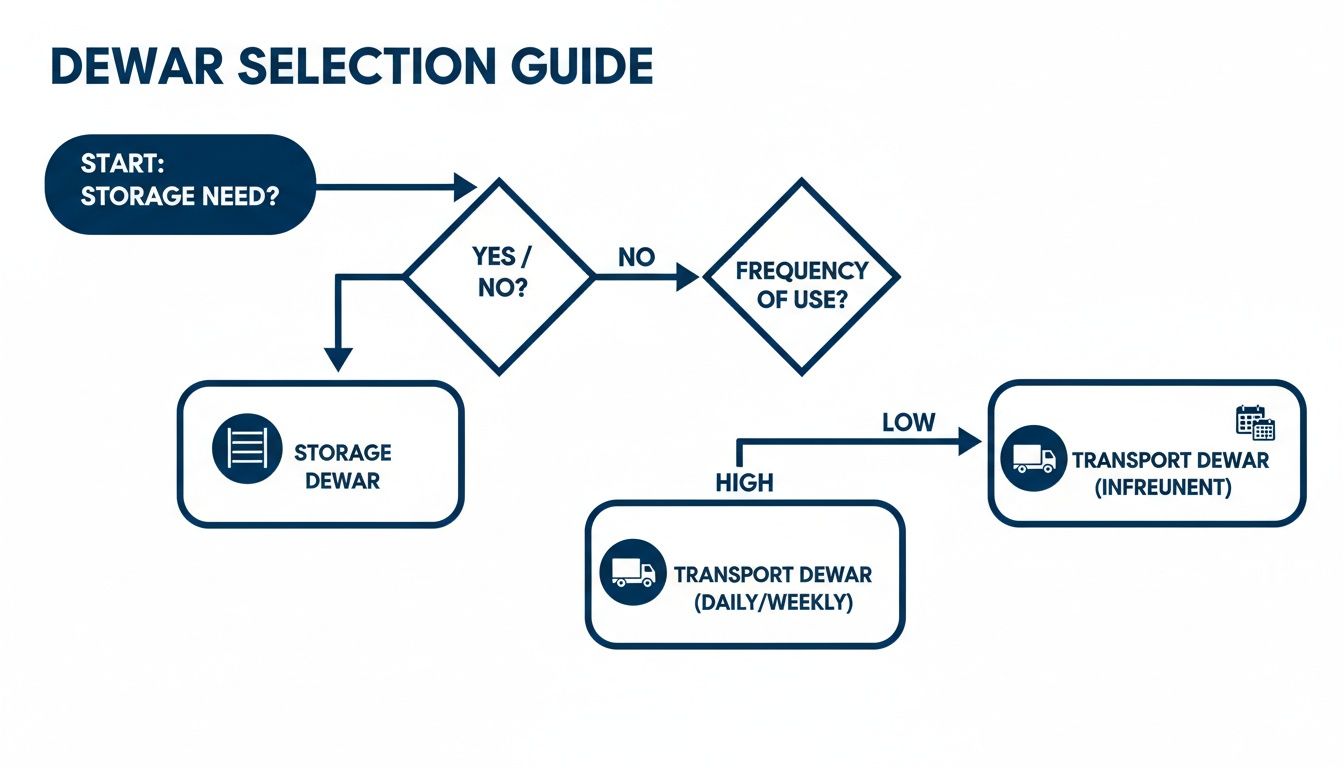
As you can see, the first and most critical filter is whether your application is static and archival or dynamic and mobile. Get this wrong, and you'll fight your equipment daily.
Matching Specifications to Your Application
Once you've settled on the general type, it’s time to dig into the specs. Capacity—how many vials you can fit—is the obvious starting point. But other metrics are just as crucial for predicting long-term performance and, more importantly, cost.
Static Holding Time vs. Evaporation Rate: Static holding time is the manufacturer's idealized estimate of how long a full, untouched dewar will hold nitrogen. The daily evaporation rate (in liters per day) is the far more practical number. It tells you your real-world LN2 consumption. Always hunt for a low evaporation rate to cut down on refill frequency and cost.
For instance, a high-throughput biomanufacturing facility managing a master cell bank will put its money on a large-capacity storage dewar with the longest possible static holding time. A small research lab, on the other hand, might prioritize a compact, easy-access dispensing dewar for its daily cell culture work.
Remember, the sticker price is just the beginning. The real expense comes from daily operation and LN2 consumption, so thinking about reducing total cost of ownership from day one will save you a fortune down the road.
Safe Handling and Filling Procedures
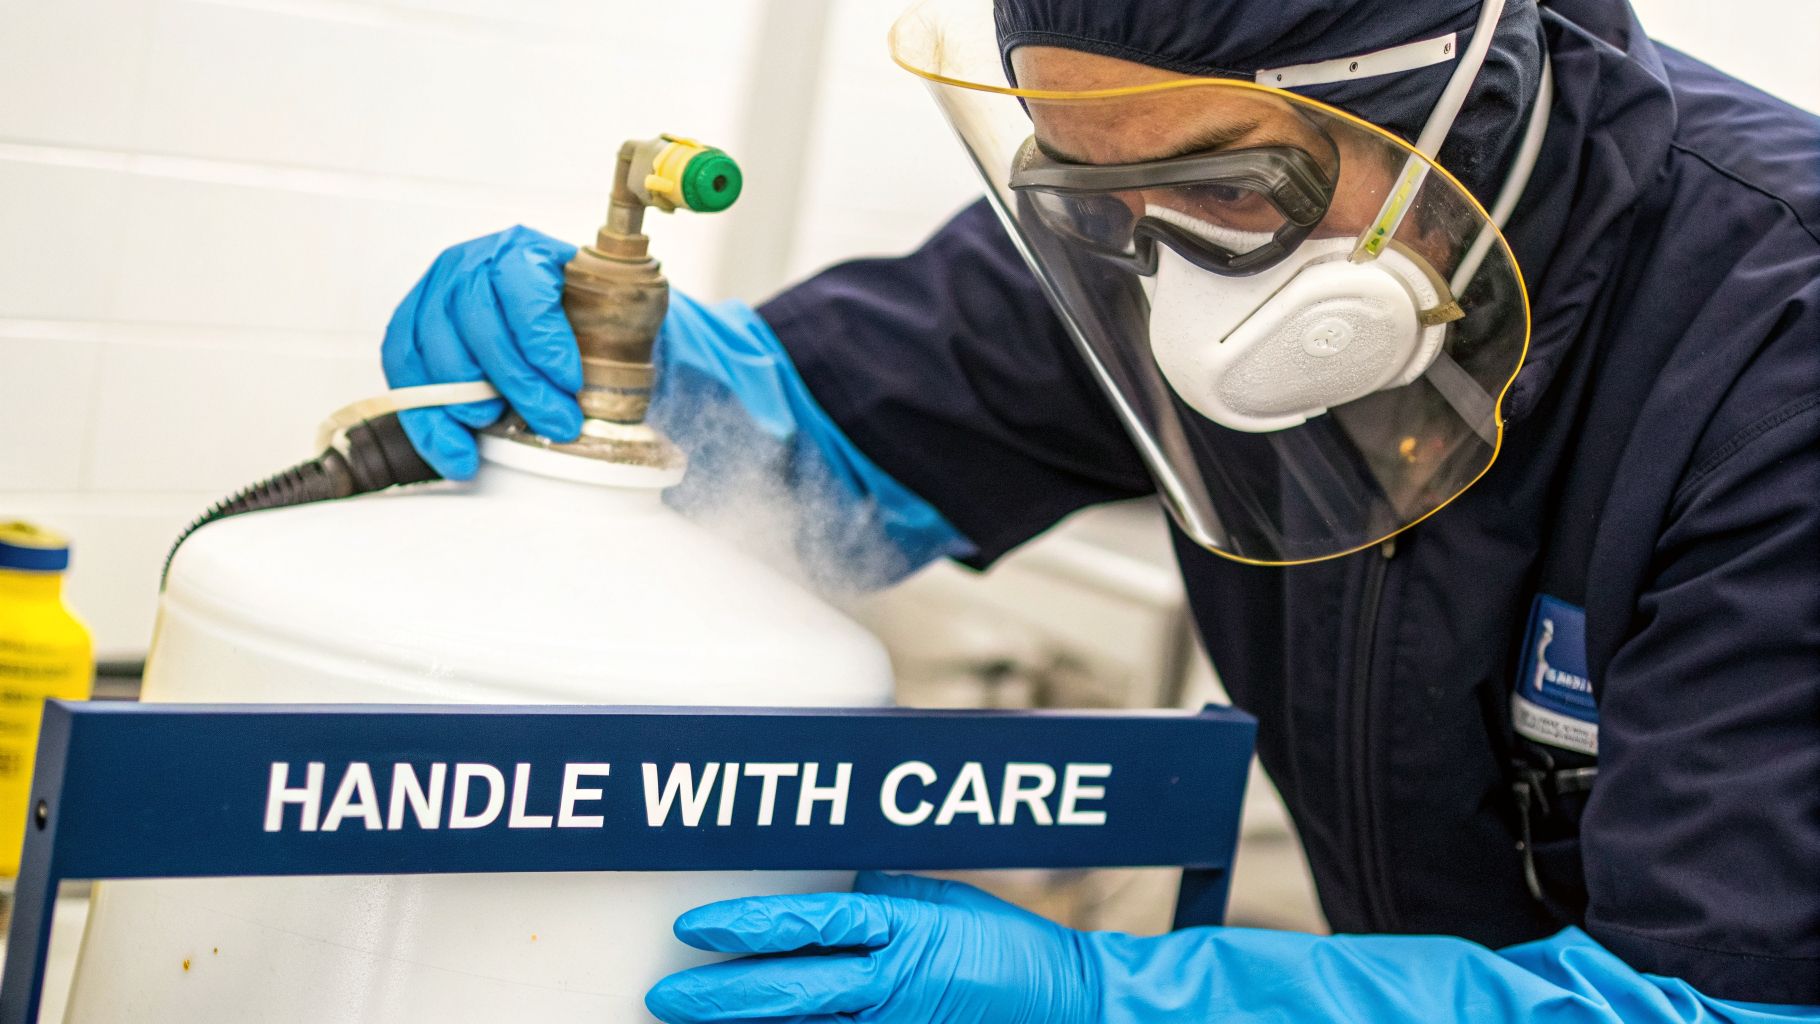
Working with a liquid nitrogen dewar is not a casual task. It demands respect and a strict, non-negotiable adherence to safety protocols. Liquid nitrogen (LN2) is deceptively dangerous, and a single moment of carelessness can lead to severe, life-altering injuries. This is your operational playbook for handling and filling these vessels, designed to protect you, your team, and your lab’s safety record.
The first danger is the cold. At -196°C (-320°F), LN2 causes severe frostbite almost instantly on contact with skin or eyes. The second, and more insidious, danger is asphyxiation. As LN2 warms, it expands into a gas at a massive ratio of nearly 1:700. Even a small spill can rapidly displace all the oxygen in a poorly ventilated room, creating a lethal, invisible hazard.
Essential Personal Protective Equipment
Before you even think about approaching a liquid nitrogen dewar, putting on the correct Personal Protective Equipment (PPE) is non-negotiable. Your standard lab coat and nitrile gloves offer zero protection against cryogenic temperatures. They will freeze solid and shatter on contact. You absolutely must use specialized gear.
Your essential PPE checklist should always include:
- Cryogenic Gloves: These are thick, insulated, multi-layered gloves specifically designed to protect your hands from splashes and brief contact with extreme cold.
- Full Face Shield: This is critical. It protects your entire face and eyes from splashes, which can and do happen unexpectedly during transfer. Goggles alone are not sufficient.
- Lab Coat or Apron: A closed lab coat or a dedicated cryogenic apron shields your body and clothing from accidental spills.
- Closed-Toed Shoes: Always wear sturdy, fully enclosed shoes. A splash on your feet can be just as damaging as one on your hands.
Never, ever compromise on PPE. The risks of catastrophic cold burns and asphyxiation are real. Treating every interaction with a liquid nitrogen dewar with caution is the hallmark of a professional and safe lab.
Step-by-Step Filling Protocol
Safely filling a dewar is a methodical, unhurried process. Rushing or taking shortcuts is a direct invitation for an accident. The goal is to transfer the LN2 smoothly, minimizing both the violent splashing and the wasteful boil-off.
Follow this procedure every single time:
- Ensure Proper Ventilation: Only fill a dewar in a well-ventilated space. Open a door, turn on an exhaust fan—do whatever is necessary to prevent nitrogen gas from building up.
- Pre-Cool the Dewar: If you're filling a warm or room-temperature dewar, start by adding just a small amount of LN2. Gently swirl it around and let it boil off completely. This pre-cools the inner chamber and prevents thermal shock, which could crack or damage the vessel.
- Position the Transfer Hose: Securely place the transfer hose from the main supply tank so it reaches toward the bottom of the receiving dewar. This simple step drastically reduces splashing and turbulence.
- Open the Valve Slowly: Begin the transfer by opening the valve on the source tank very slowly. A sudden, high-flow rush will cause explosive boiling and dangerous splashing.
- Monitor the Fill Level: Fill the dewar to the correct level, but never to the brim. You must leave adequate headspace to accommodate normal boiling and to prevent overflow when you insert your sample racks.
- Close the Valve and Wait: Once you're done, shut the valve on the source tank. Let the vigorous boiling inside the dewar subside before you attempt to move it or insert the cap.
Most importantly, never seal a liquid nitrogen dewar completely. These containers are specifically designed to vent gas continuously as the LN2 boils off. Sealing it with an airtight plug will cause pressure to build up, turning your dewar into a potential bomb. Always use the manufacturer-provided stopper or cap, which is engineered with vents to allow gas to escape safely.
Maintaining Your Dewar for Optimal Performance
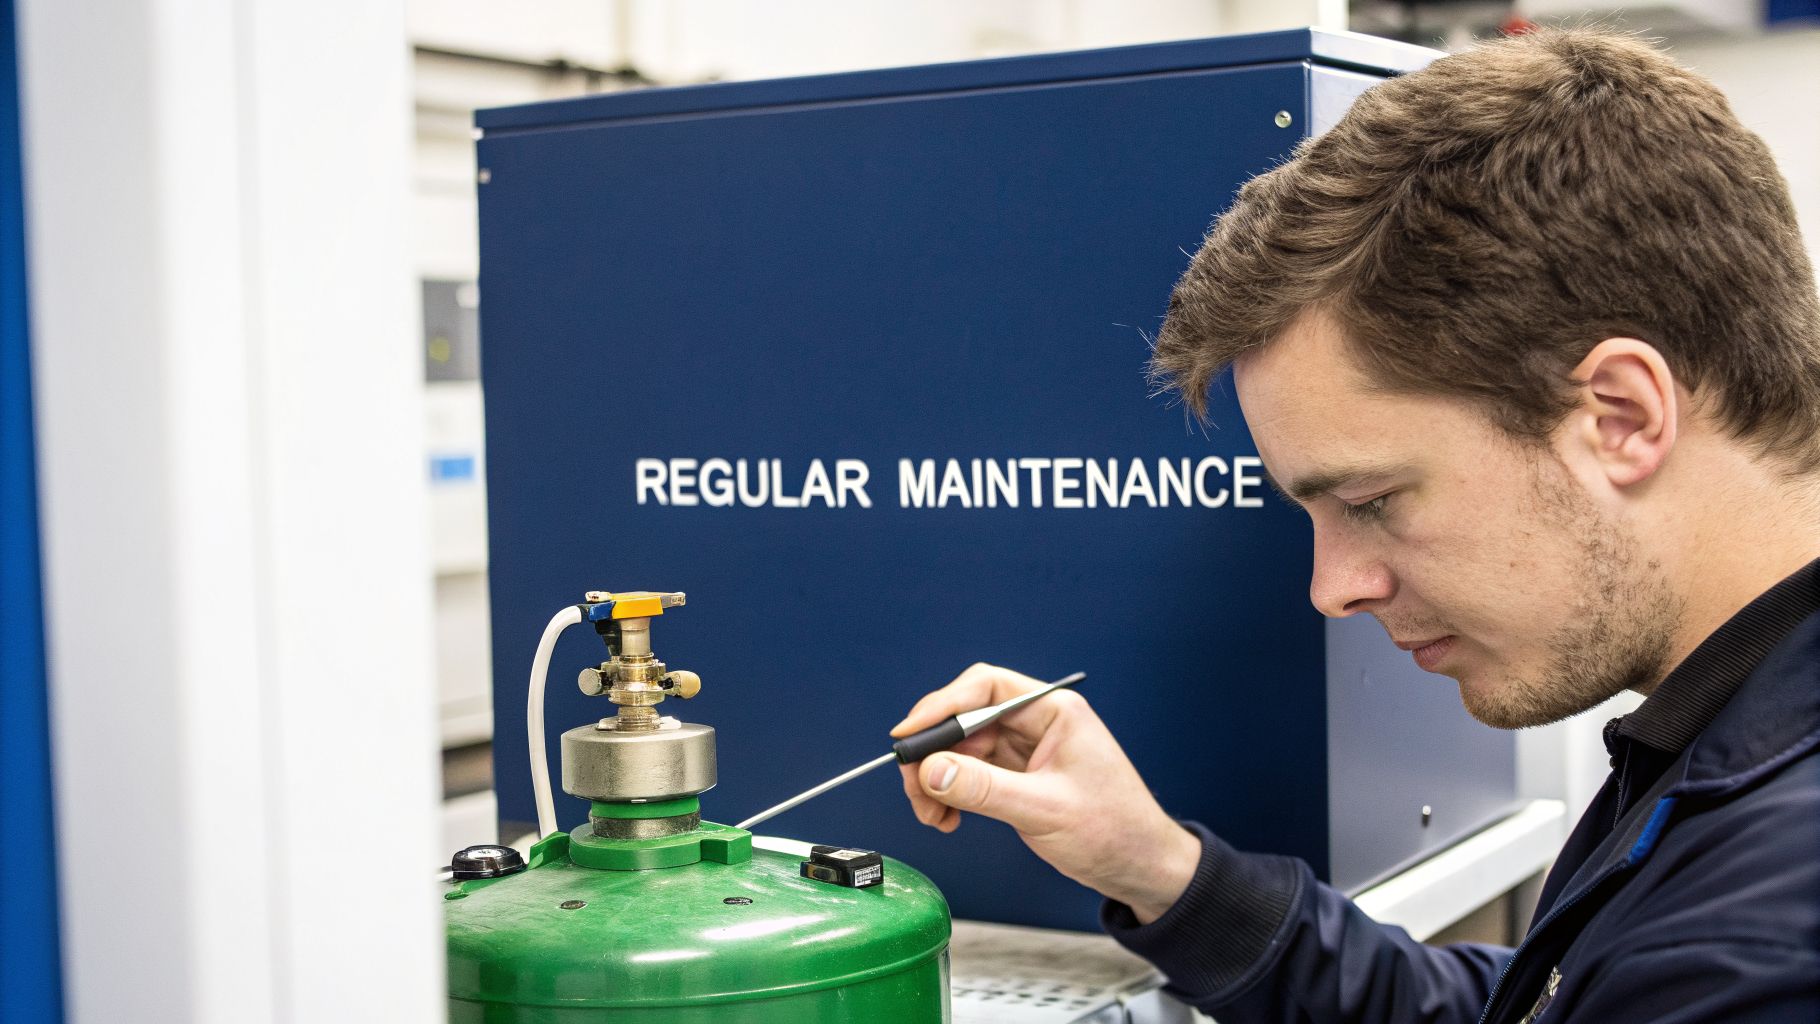
That stainless steel dewar in the corner of your lab isn't just a glorified thermos—it's the only thing standing between your irreplaceable cell lines and catastrophic failure. Proactive maintenance isn’t just another task on a checklist; it’s fundamental to protecting the years of work stored inside.
Ignoring your dewar is like driving without a fuel gauge. You might get away with it for a while, but you’re setting yourself up for a sudden, devastating breakdown. A well-cared-for dewar, on the other hand, gives you predictable performance and the peace of mind that comes with it.
Spotting Early Warning Signs of Failure
The most common—and dangerous—failure point for any liquid nitrogen dewar is a breach of its vacuum insulation. When that vacuum fails, ambient heat rushes into the inner chamber, accelerating the LN2 boil-off so rapidly it can destroy your samples in a matter of hours.
Fortunately, a failing dewar doesn't usually die in silence. It gives off clear warning signs if you know what to look for.
- Excessive Frost or "Sweating": This is the biggest red flag. If you see frost or condensation forming on the dewar's outer wall, it means the surface is getting cold—a sure sign the vacuum insulation is compromised.
- Rapid Boil-Off Rate: You find yourself refilling the dewar far more often than you used to. A tank that once held its temperature for weeks now struggles to last a few days.
- Hissing or Pinging Noises: Strange sounds coming from the dewar can signal a leak in the vacuum space.
A healthy liquid nitrogen dewar might lose less than a liter of LN2 per day. But research shows a complete vacuum failure can trigger a catastrophic spike in evaporation, emptying a small tank in under 24 hours. This is why routine monitoring is non-negotiable for safeguarding priceless materials like the cryoprotective media used by R&D teams. To see the data behind these failure rates, you can read the full research on dewar performance and safety.
Routine Maintenance Checklist
A simple, consistent maintenance routine is your best defense. It will catch most problems long before they become emergencies. Making these checks a part of your lab’s weekly or monthly schedule is a small investment that pays massive dividends in sample security.
1. Visual Inspection: Once a week, give the dewar a quick once-over. Look for frost patches, dents, or any damage to the neck tube and lid. Physical damage is a leading cause of vacuum seal failure.
2. The "Ping Test": This is a classic trick to check the vacuum's integrity. Gently tap the side of the dewar with a solid object like a wrench. A dewar with a good vacuum will make a clear, high-pitched "ping." If you hear a dull thud, the vacuum is likely gone.
3. Cleaning and Inventory: Keep the exterior of the dewar clean and maintain an organized inventory system. The less time the lid is off while you're hunting for a specific vial, the less nitrogen you’ll lose to boil-off.
4. Check Safety Devices: On pressurized dewars, regularly inspect the pressure-relief valves. A valve that is blocked or faulty can lead to a dangerous buildup of pressure, creating a serious safety hazard.
Making these simple checks a habit empowers your team to spot trouble early and act decisively, preventing years of hard work from being lost in an instant.
Protecting Your Most Valuable Research Assets
We’ve covered the fundamentals—from picking the right dewar for your workflow to handling it safely and keeping it in working order. Following these steps isn't just about managing a piece of equipment.
It's about actively protecting your time, your budget, and the future of your research. This is how you build a lab that minimizes variables and shields its discoveries from preventable loss. A key part of this is thinking about the entire lifecycle of your equipment—from purchase to retirement—through a structured process of asset lifecycle management.
From Equipment to Empowerment
When you shift from just following safety rules to a culture of proactive care, something fundamental changes. The dewar stops being a passive storage tank and becomes an actively managed asset, one that directly supports the integrity of every single experiment you run. This is what separates labs that just get by from those that truly excel.
An empowered lab is one that minimizes variables and protects its discoveries. Take these principles and apply them to ensure your work stands the test of time, supported by reliable tools and consistent protocols.
Ultimately, every protocol you master and every maintenance check you perform is a direct investment in your results. The confidence that comes from knowing your samples are secure is what frees you up to focus on the real work—asking the next big question and pushing your science forward.
Your Checklist for Long-Term Success
Don't just read these principles. Turn them into action. Make checklists, get maintenance on the calendar, and make sure every person on your team is trained on safe handling.
- Review your selection process: Does your dewar really match your lab’s workflow?
- Audit your safety gear: Is your PPE complete, in good shape, and always within arm's reach?
- Schedule maintenance now: Put visual inspections and vacuum checks on the calendar for the rest of the year.
This consistent, detail-oriented approach is what ensures your lab's tools and protocols are as rigorous as your research itself.
Frequently Asked Questions
Even with the best training, it’s the day-to-day questions about using a liquid nitrogen dewar that always come up. Here are some straightforward answers to the common problems and queries we see from labs handling cryopreservation every day.
How Often Should I Refill My Dewar?
There's no single answer to this — the refill schedule for your liquid nitrogen dewar is a moving target. It depends on the dewar's size, its static holding time, and, most critically, how often you’re actually opening it to get samples. Every time you lift that lid, you're accelerating the boil-off.
The best practice is to get a feel for your dewar's rhythm. Start by checking the nitrogen level weekly with a dedicated measuring stick. Never use a hollow tube or pipette for this; the rapid boiling can erupt and cause a dangerous splash-back.
Most labs land on a regular refill cycle, often weekly for smaller, high-traffic dewars and less frequently for big storage tanks. The unbreakable rule is to always keep the liquid level well above your samples. If you don't, you risk temperature swings that can kill your cells.
Can I Transport a Dewar in My Personal Car?
Absolutely not. You should never, under any circumstances, transport a liquid nitrogen dewar in a personal car. This isn't just a suggestion; it’s an extremely dangerous practice prohibited by nearly every institutional safety policy for a very simple reason.
One liter of liquid nitrogen expands into almost 700 liters of nitrogen gas.
In the confined space of a passenger car, even a tiny, slow leak can displace oxygen so fast that it creates a lethal asphyxiation hazard. The nitrogen gas is colorless and odorless — you wouldn't know it was happening until you lost consciousness at the wheel.
Always use a designated, properly ventilated vehicle, like a work van or truck. Make sure the dewar is strapped down and secured in an upright position to prevent it from tipping. Following your institution's cryogenics transport protocol is non-negotiable.
What Is the Difference Between Liquid and Vapor Phase Storage?
This is a critical decision that pits maximum cold against minimal contamination risk. What you choose depends entirely on how valuable your samples are.
Liquid Phase Storage: This is as cold as it gets. You submerge your sample vials directly into the liquid nitrogen, holding them at a rock-solid -196°C. The trade-off? If even one vial was improperly sealed and leaks, it can cross-contaminate every other sample in the dewar. It’s a small but real risk.
Vapor Phase Storage: Here, you store samples in the cold nitrogen vapor that sits above the liquid. The temperature is a bit warmer—usually between -150°C and -190°C—but still safely below the glass transition point where cellular damage occurs. This method nearly eliminates the risk of cross-contamination, making it the non-negotiable standard for master cell banks, clinical samples, and other irreplaceable materials.
Your lab needs to weigh the pros and cons based on your specific application, risk tolerance, and just how catastrophic it would be to lose your samples.
What Does Frost on the Outside of My Dewar Mean?
If you see frost or "sweating" on the outside of your dewar, you have an emergency. This is a massive red flag that the vacuum insulation between the inner and outer walls has failed. A breach like this is a catastrophic failure.
Without the vacuum, heat from the room floods the inner chamber, causing an uncontrolled, rapid boil-off of your liquid nitrogen. Your samples are in immediate danger of thawing.
You need to act fast. Transfer your samples to a backup dewar immediately, and get the faulty unit out of service. It's either headed for repair or the scrap heap.
At PurMa Biologics, we understand that reliable cryopreservation is the foundation of reproducible science. Our high-quality cryoprotective media and cell culture reagents are designed to give you confidence in every step of your workflow, from storage to scale-up. Discover our full range of solutions at https://www.purmabiologics.com.