

Live/dead staining is one of those techniques that sounds simple on paper. The idea is basic: a dye gets into a cell with a leaky, compromised membrane (a dead cell), but it can't get into a cell with a healthy, intact one (a live cell). It’s a foundational technique that gives you a quick but critical read on the health of your cell population.
Why Getting Live/Dead Staining Right Is Non-Negotiable
In modern cell biology, just counting cells isn't nearly enough. The reliability of your experiment hinges entirely on the quality of your starting material. A proper live/dead assay is the essential QC step that validates your cell population’s health before you pour time, money, and expensive reagents into the actual experiment. It’s far more than a headcount; it's a functional check-up.
The Foundation of Data You Can Trust
Think of a good viability stain as the gatekeeper for your entire project. If you skip it or do it poorly, you risk building your whole experiment on a faulty foundation of dying cells. And those aren’t just passive passengers—dead and dying cells are notorious for leaking proteases, nucleases, and reactive oxygen species that can actively harm the healthy cells around them, completely skewing your results.
This is precisely why older, quick-and-dirty methods like trypan blue exclusion are falling out of favor. Sure, they're fast, but they are incredibly prone to subjective interpretation by the person at the microscope and often don't deliver the clean, quantitative data you need for serious research. In contrast, modern fluorescence-based assays give you far superior sensitivity and data you can actually graph.
A viability check isn't just another box to tick on your protocol. It’s the checkpoint that ensures the integrity of your drug screens, cell therapy development, and basic research. It’s about generating data you can actually stand behind.
The accuracy of live/dead staining is especially crucial in fields like viral culture, where the entire experiment depends on maintaining and accurately assessing the viability of the host cells.
It's More Than Just a "Live" or "Dead" Switch
The reality in the dish is more nuanced than a simple binary choice. Some of the best staining kits can actually reveal cells in an intermediate, dying state, which challenges that simple live/dead classification.
For instance, the LIVE/DEAD BacLight staining kit combines SYTO9 (which stains all cells green) and propidium iodide (PI, which stains dead cells red). One study on E. coli hit with UVA radiation found that as cells started to die and their membranes collapsed, they didn't just flip from green to red. Instead, they entered a transitional state, showing both a weak green and a strong red signal, clearly indicating they were in the process of dying. You can find the full study on these intermediate states over at ASM.org.
This complexity has massive real-world consequences, especially in applications like cell sorting. If you fail to properly exclude dead and dying cells from your gating strategy, you can torpedo your results.
- Inflated Signals: A seemingly small population of 10% dead cells can inflate the signal from rare cell populations by as much as 5 to 10 times if they aren't properly gated out.
- Wasted Resources: Every dead cell you sort is a waste of valuable instrument time, and even worse, it contaminates the pure, live cell fraction you’re trying to collect.
- False Positives: Dead cells are "sticky." They non-specifically bind antibodies, which is a recipe for false-positive signals that will muddy your analysis and send you chasing ghosts.
Ultimately, taking the time to perform an accurate live/dead stain is a small investment that pays off enormously. It saves you from repeating experiments, questioning your own conclusions, and wasting resources on data you can’t trust.
Choosing the Right Dyes for Your Experiment
Get your live/dead staining wrong, and you might as well throw your data out. The choice of dye isn't just a minor detail—it's the foundation of your viability data. With so many fluorescent options, it’s easy to get overwhelmed, but matching the right dye to your experiment is the first step toward clean, trustworthy results.
At its core, live/dead staining is simple: you're trying to separate healthy, intact cells from the dead and dying ones. Dyes do this in a few different ways, but most protocols combine two dyes for a definitive, two-color answer.
The Workhorses: Classic Dyes for Quick Viability Checks
For a quick, no-fuss viability check, most labs rely on the classic pairing of Calcein-AM and Propidium Iodide (PI). This combination gives you a straightforward green/red readout of live and dead cells, respectively, and it's perfect for routine culture monitoring.
Calcein-AM is a brilliant stain for identifying live cells. It’s cell-permeant, so it easily crosses the membrane of every cell in your sample. Once inside a live cell, active enzymes called esterases snip off the "AM" group. This traps the now-fluorescent calcein molecule, making the cell glow a vibrant green. Dead cells don't have this enzymatic activity, so they stay dark.
Propidium Iodide (PI) is the perfect counterpart. It’s a DNA-binding dye that absolutely cannot get past the intact membrane of a healthy, live cell. But when a cell dies and its membrane starts to fall apart, PI rushes in, latches onto the DNA, and fluoresces bright red. A similar dye, 7-AAD (7-Aminoactinomycin D), works the same way but glows in the far-red spectrum, making it a great alternative if your experiment already uses green reporters like GFP.
Real-World Scenario: You're about to lyse a plate of HeLa cells for a Western blot and need to be sure the culture is healthy. A quick 15-minute incubation with Calcein-AM and PI, followed by a look under the scope, gives you an immediate answer. A field of glowing green cells means you're good to go.
When Your Experiment Demands More Advanced Dyes
While the classic dyes are great for simple checks, they fall short in more complex experiments. This is where a newer class of reagents, known as fixable viability dyes, becomes essential.
These dyes work differently. They are amine-reactive, meaning they form permanent, covalent bonds with proteins. Because they can't cross an intact membrane, they only weakly label the surface proteins of live cells. On dead, leaky cells, however, they react with both surface and internal proteins, resulting in a signal that is often 10- to 20-fold brighter.
This huge difference in fluorescence is easily separated by flow cytometry, but their biggest advantage is right in the name: they are fixable. Once bound, the signal isn't going anywhere.
- Complex Flow Cytometry: If you need to stain for intracellular targets, you have to fix and permeabilize your cells. Classic dyes like PI would wash right out during these steps, rendering your viability data useless. A fixable dye’s signal is locked in, surviving the entire staining process.
- Long-Term Imaging: Some viability dyes are toxic over time. Newer, low-toxicity options like MortaLIVE™ are designed for real-time cytotoxicity assays, letting you track cell death over hours or days without the dye itself killing the cells.
- Avoiding Spectral Overlap: Many experiments rely on Green Fluorescent Protein (GFP). Since Calcein-AM also fluoresces green, you'd be dealing with impossible signal bleed-through. A fixable viability dye that emits in the violet, blue, or far-red range is the only way to get clean data.
To help you navigate the options, here's a quick comparison of the most common dyes used in the lab.
Quick Comparison of Common Live Dead Staining Dyes
Use this table to quickly compare key features of popular viability dyes and decide which is best suited for your microscopy or flow cytometry workflow.
| Dye | Target | Mechanism | Fixable | Common Application |
|---|---|---|---|---|
| Calcein-AM | Live Cells | Esterase activity cleaves AM group, trapping fluorescent calcein | No | Live-cell microscopy, rapid viability checks |
| Propidium Iodide (PI) | Dead Cells | Enters compromised membranes, intercalates with DNA | No | Flow cytometry, basic dead cell check (with Calcein) |
| 7-AAD | Dead Cells | Enters compromised membranes, intercalates with DNA | No | Flow cytometry (alternative to PI to avoid GFP overlap) |
| Fixable Viability Dyes | Dead Cells | Amine-reactive dyes bind covalently to proteins on leaky cells | Yes | Multi-color flow cytometry, intracellular staining protocols |
Picking the right dye really boils down to what your experiment needs. For a quick culture health check, PI is a cheap and effective tool. But for a multi-color flow panel that involves fixation, a fixable amine-reactive dye is non-negotiable. Matching the reagent to the application from the start is the key to producing data you can actually trust.
Executing Flawless Staining for Fluorescence Microscopy
Moving from dye selection to the lab bench is where the real work begins. Getting clean, publication-ready images from a live/dead stain isn't just about pipetting reagents—it's about protecting the true state of your cells at every single step.
Every action, from harvesting your cells to mounting the final slide, can introduce artifacts that will absolutely tank your results.
Let’s walk through a rock-solid protocol for staining both adherent and suspension cells using the classic, and highly effective, Calcein-AM and Propidium Iodide (PI) combination.
Preparing Your Cells and Dyes
The first rule of any cell-based assay is simple: be gentle.
For adherent cells, this means backing off on the trypsin. Over-trypsinization shreds cell membranes, causing perfectly healthy cells to light up as dead. For suspension cells, keep the centrifuge on a low setting (think 200-300 x g for 5 minutes) to avoid the stress of being smashed into a tight pellet.
After harvesting and washing your cells in a buffered saline like PBS, it’s time to mix your staining solution. The goal here is to find the sweet spot—the lowest concentration that gives a bright, unmistakable signal. Using too much dye is a classic rookie mistake that leads to toxicity and hazy background fluorescence.
- Calcein-AM: A good starting point is 1-2 µM.
- Propidium Iodide (PI): Start with a concentration of 1-5 µg/mL.
Always prepare your staining solution fresh right before you use it. For example, if you have a 1 mg/mL stock of PI, you’d dilute it 1:1000 right into your cell suspension to hit a final concentration of 1 µg/mL. And remember, the first time you use a new cell line or a new batch of dye, run a quick titration series to dial in your exact optimal concentrations.
One of the most critical, yet frequently skipped, controls is the 100% dead cell sample. You need this. Prepare an aliquot of your cells and kill them with heat (65°C for 15-30 minutes) or a quick 70% ethanol treatment. This positive control is non-negotiable for setting your microscope's exposure and definitively knowing what a "dead" signal looks like.
This visual guide helps put the decision between microscopy and flow cytometry into the context of your overall experimental plan.
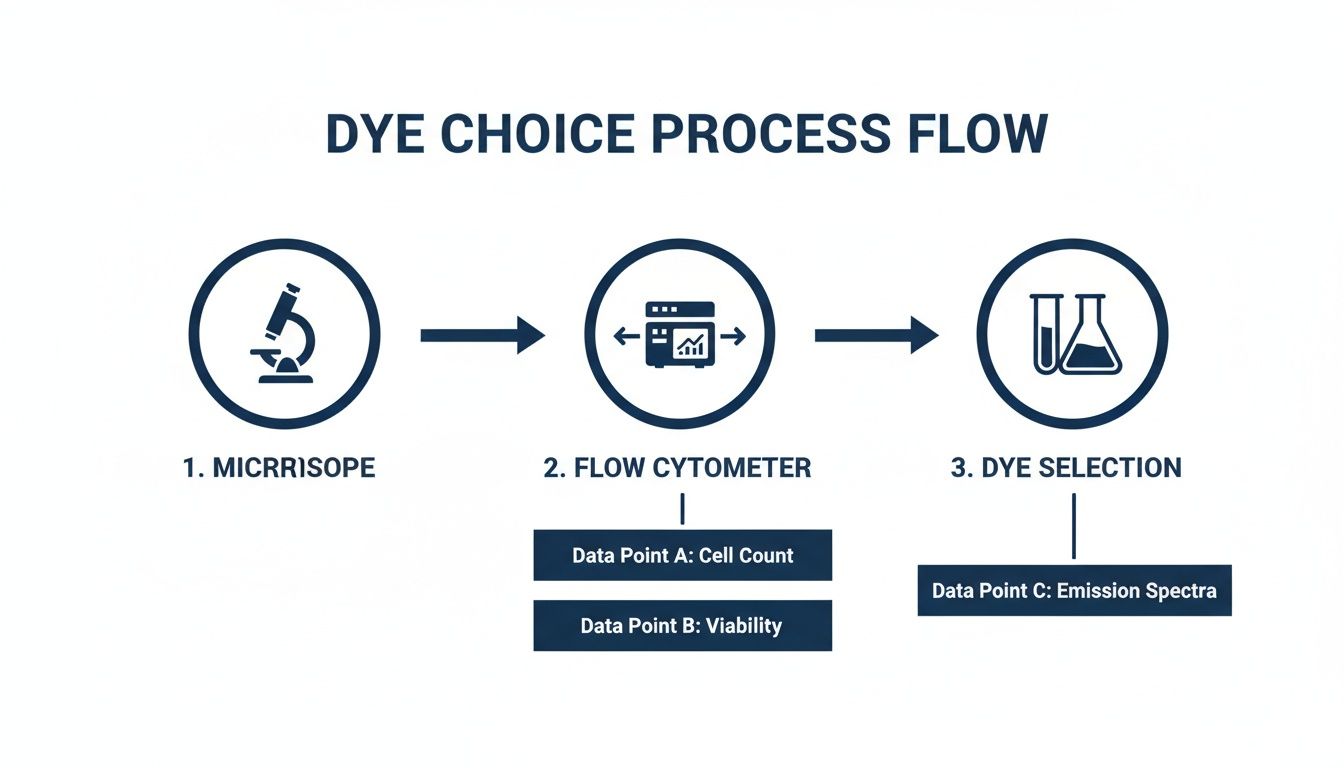
As the flow chart shows, your choice of instrument dictates a unique path for sample prep and data acquisition.
Incubation and Washing for a Clean Signal
With your freshly made dye solution in hand, gently resuspend your cell pellet and let it incubate. A typical incubation runs for 15-30 minutes at room temperature or 37°C. The most important part? Protect your tubes from light. These dyes are photosensitive, and exposing them to ambient light can photobleach your signal before you even get to the microscope.
After incubation comes the wash step—and it’s absolutely critical for getting rid of background fluorescence. If you skip this, unbound dye left floating in the media will create a hazy glow that makes it impossible to tell what’s a real signal and what’s just noise.
- Gently pellet the cells again via centrifugation.
- Carefully aspirate the supernatant, taking the excess dyes with it.
- Resuspend the cells in fresh, pre-warmed PBS or, even better, a phenol red-free medium.
- For the cleanest possible background, repeat the wash step one more time.
Here's a pro tip: that phenol red in your standard culture medium is autofluorescent and will interfere with green signals like Calcein. Using a phenol red-free medium from a trusted source like PurMa Biologics for your final wash and imaging steps is the secret to getting a jet-black background and razor-sharp images.
Mounting and Imaging Best Practices
For the final step, get your cells onto a slide. For suspension cells, a small drop on a glass slide with a coverslip is all you need. For adherent cells, you can stain them directly on the coverslip they were grown on.
Once you’re on the microscope, work quickly and methodically. Photobleaching is your enemy.
- Find Your Focus First: Use brightfield to locate your cells before you flip on the fluorescence lasers. This minimizes unnecessary light exposure.
- Set Exposure with Your Controls: This is why you made them! Use your unstained cells to set the baseline black level. Then, use your heat-killed control to set the exposure for the "dead" (red) channel. Finally, use your healthy stained cells to set the "live" (green) channel exposure.
- Don't Burn Your Sample: Use the lowest laser power and the shortest exposure time that gives you a clear image. Avoid hitting the same field of view over and over.
By following these steps—gentle handling, optimized dye concentrations, mandatory controls, and smart imaging—you’re setting yourself up for a flawless live/dead staining experiment that produces clear, reliable, and publication-quality data.
How to Optimize Staining for High-Throughput Flow Cytometry
[Flow Cytometry](https://woolfsoftware.bio/glossary/measurement-profiling/flow-cytometry/) gives you incredible, quantitative data on cell viability, but you can’t just dump your microscopy protocol into a 96-well plate and expect it to work. High-throughput analysis is a completely different beast, and it all starts with something labs routinely mess up: getting a true single-cell suspension.Any accidental membrane damage from harsh pipetting or an overly aggressive spin-down will create a flood of false-positive dead cells. This will completely skew your data before your samples even see a laser.
Setting Up Your Plate for Success
When you're running dozens of samples, staining in individual tubes is a non-starter. You need a 96-well plate to handle your samples, controls, and replicates all at once. The first step is to gently harvest your cells, always keeping that perfect single-cell suspension as your top priority.
After a gentle wash, resuspend your cells in a suitable buffer. Something like PBS with a small amount of BSA works well to keep the cells from clumping. Now, it's time for the dyes. For flow, it's almost always better to choose a dead-cell stain that emits in the far-red spectrum, like 7-AAD. This is especially true if you have GFP-expressing cells, as it drastically minimizes spectral overlap.
A common mistake is to add way too much dye. High concentrations can cause healthy cells to pick up the dead stain or, worse, lead to aggregation. Always run a quick titration to find the lowest effective concentration for your specific cell type—it saves a ton of time and reagents later.
After a short incubation, usually 15-20 minutes protected from light, you're ready for the cytometer. One of the big advantages of flow is that for certain dyes, you don't even need to wash. The instrument can easily resolve the bright signal from dead cells against the background. If you're using fixable viability dyes, however, washing is mandatory.
Mastering Compensation and Gating
The biggest headache in multi-color flow cytometry is spectral overlap. This is what happens when the fluorescence from one dye "spills over" into the detector meant for another. For example, the signal from GFP can easily bleed into the channel used for PI, making it impossible to tell what's what.
This is exactly why compensation controls are non-negotiable. You need to run a single-color control for every single fluorophore in your experiment:
- Unstained Cells: This sets your baseline autofluorescence.
- Live Cells + Live Stain Only: If you're using something like Calcein-AM.
- Dead Cells + Dead Stain Only: For your 7-AAD or fixable dye.
These single-stain controls give the cytometer’s software the data it needs to mathematically subtract the bleed-through. It’s the only way to ensure the signal you see in each channel is actually from the dye it's supposed to be from. Once your data is properly compensated, you can confidently draw your gates to quantify the live and dead populations.
Interpreting Your Flow Cytometry Data
Let’s walk through a real-world scenario. You're monitoring the health of a mixed T-cell population in a bioreactor and need fast, quantitative feedback to tweak the culture conditions. You stain with a fixable viability dye and a T-cell marker antibody and run your plate.
First, you'll gate on the single-cell population on your plot to kick out any doublets. From there, you'll look at a histogram or a dot plot showing the viability dye's fluorescence. You should see two clear peaks: a dim population (your live cells) and a brightly fluorescent one (your dead cells). By drawing a gate around each, you instantly get a precise percentage of live vs. dead.
This quantitative power shows just how outdated other methods are. For instance, we now know that traditional viability counts like colony-forming units (CFU) can severely underestimate the true number of live cells by 50% or more in stressed populations. Modern flow dyes like 7-AAD can effectively eliminate a 10% dead cell population from your analysis, preserving the integrity of a rare 1% target population within that sample.
From Pixels to Percentages: Analyzing Your Data and Fixing Common Issues

Getting a great image or a clean flow plot feels like a win, but that's only half the battle. The real insights come from turning those colorful pixels and scatter plots into hard numbers. Just eyeballing a field of cells and saying "looks like most are alive" isn't going to cut it for a publication or a critical decision. You need data.
For fluorescence microscopy, this means getting quantitative. The good news is you don't need fancy, expensive software. Open-source workhorses like ImageJ or Fiji are perfect for this. You can use their cell counting tools to get a total cell number, then count the live (green) and dead (red) cells across several fields of view. This gives you a precise viability percentage, turning a pretty picture into defensible data.
How to Interpret Your Data and Set Your Gates
When it comes to flow cytometry, your entire analysis hinges on how you set your gates. This is where your unstained and single-color controls become non-negotiable. Use the unstained control to see where your autofluorescence baseline is. Then, use your heat-killed positive control to confidently draw a gate around the "dead" population. This is the only way to be sure you aren't lumping dimly stained dead cells into your live gate.
You'll typically see three populations emerge on your plot:
- Live Cells: These will be bright for your live-cell dye (like Calcein-AM) but negative for the dead-cell stain.
- Dead Cells: These have lost their enzymatic activity, so they'll be negative for the live stain but bright for the dead-cell dye (like PI or 7-AAD) that has flooded their compromised membranes.
- Dying (Apoptotic) Cells: You'll often spot a third group that's dim for both stains. These are the cells in transition—they have reduced enzymatic activity but their membranes are still mostly intact.
This level of detail is especially critical in complex models. Take 3D spheroids, which are far better mimics of solid tumors. One study on glioblastoma spheroids using calcein-AM (live) and Helix NP™ Blue (dead) found that this direct viability staining was 20-30% more accurate than just measuring changes in spheroid size—a common but flawed method that completely misses cell death happening inside the core. In that study, dead cell counts climbed to 31.2% by day 7 post-treatment, an insight that size measurements would have entirely overlooked. Discover more about these findings and their impact on drug screening.
The whole point of analysis is to draw clear, defensible lines between your cell populations. If you skip the controls and guess at your gates, your viability numbers are essentially meaningless.
When Things Go Wrong: A Troubleshooting Guide
Even with a well-honed protocol, you'll eventually get a result that just looks… weird. Don't panic. Most live/dead staining issues trace back to a few usual suspects. Here’s a quick diagnostic guide to get you back on track without burning through precious samples.
| Common Problem | Likely Cause | Actionable Solution |
|---|---|---|
| All Cells Are Staining Red (Dead) | 1. Your harvesting technique is too rough. 2. The dye is too concentrated and cytotoxic. 3. Your cells were unhealthy to begin with. |
1. Be gentler. Spin cells down at a lower speed (like ~200 x g) and avoid vigorous pipetting. 2. Run a titration to find the lowest effective concentration for your specific cell type. 3. Check your incubator CO₂, humidity, and culture media for issues. |
| High Background Signal | 1. You didn't wash well enough post-staining. 2. Your media is autofluorescent. 3. The dye has precipitated. |
1. Add an extra wash step with PBS or a compatible buffer. 2. Use a phenol red-free medium, like those from PurMa Biologics, for the staining and imaging steps. 3. Always vortex your dye stock before diluting and make sure it’s fully dissolved. |
| Healthy Cells Are Taking Up Dead Stain | 1. You incubated for too long. 2. Your dead stain concentration is too high. |
1. Stick to the recommended 15-30 minute incubation time. Don't leave it "for a bit longer." 2. Dilute your dead-cell dye. Non-specific binding is a classic sign that you've oversaturated the system. |
Troubleshooting is all about the process of elimination. Start with the simplest fix. Was the dye too concentrated? Did you rush the wash step? By methodically working through the possibilities, you can pinpoint the problem, adjust your live dead staining protocol, and make sure your next run generates data you can trust.
Common Questions About Live Dead Staining
Even the most seasoned researchers run into hitches with live/dead staining. You follow the protocol to the letter, but something just looks… off. Here are some of the most common questions that pop up at the bench, with practical answers to get your assay back on track.
Can I Fix My Cells After Performing a Live Dead Stain?
This question comes up all the time, and the answer is a hard "it depends" — specifically, on the dye you're using. If you're working with classic dead-cell stains like Propidium Iodide (PI) or 7-AAD, the answer is no. These dyes are non-fixable. They only get into cells that already have damaged membranes. The moment you fix them, you perforate all the cell membranes, and the dye simply leaks out. Your signal is gone.
If you know your workflow involves fixation and permeabilization (especially for intracellular antibody staining), you absolutely must start with a fixable viability dye. These are amine-reactive dyes designed for this exact purpose. They form strong, covalent bonds with proteins. In dead cells, they flood the interior and create a super bright signal. In live cells, they can only weakly latch onto surface proteins.
Because that bond is permanent, the signal is locked in. It will survive fixation and the harsh detergents used for permeabilization. Always double-check the manufacturer’s protocol, but the rule is simple: if you need to fix, choose a fixable dye from the get-go.
Why Are My Healthy Live Cells Picking Up the Dead Stain?
This is easily one of the most frustrating things to see on a scope or a cytometer plot, but it almost always boils down to one of three culprits.
First, you might be using too much dye. If the dead-cell stain is too concentrated, it will start binding non-specifically to everything, including your perfectly healthy live cells. The solution is to run a quick titration. Find the lowest concentration that still gives you a bright, unambiguous signal on your dead-cell control.
Second, check your watch. Incubation time could be too long. Some dyes are toxic over extended periods, creating a self-fulfilling prophecy where the stain itself starts killing your cells. Stick to the recommended window, which is usually around 15-30 minutes. Don't let your samples sit on the bench.
Finally, the most common issue is simply rough cell handling. Over-trypsinizing, spinning cells down like you're trying to achieve liftoff, or aggressive pipetting can tear up cell membranes. This physical damage makes healthy cells look dead to the dye. Always be gentle when harvesting and washing your cells.
What Is the Best Control for a Live Dead Staining Assay?
For your data to mean anything, the right controls are non-negotiable. You’re just guessing without them. You need two key controls to set your gates and define your populations with confidence.
- Negative (Unstained) Control: A sample of your cells with no dye whatsoever. This is absolutely essential for gauging the baseline autofluorescence of your cell type. Some cells naturally glow, especially in the green channel where dyes like Calcein-AM emit, and you need to know what that background looks like.
- Positive (100% Dead) Control: A sample of your cells that you’ve deliberately killed. This is the only way to know for sure what a "dead" signal looks like in your system. The easiest way to do this is to heat-kill an aliquot of your cells (e.g., 65°C for 20 minutes) or treat them with 70% ethanol for about 15 minutes.
The positive control is your anchor. It’s what you use to confidently set your gates on a flow cytometer or adjust the exposure on a microscope. Without it, you’re just drawing an arbitrary line between "live" and "dead."
How Do I Deal with Autofluorescence in My Experiment?
Autofluorescence—that natural glow cells emit—can be a real headache. It often rears its head in the green channel, putting it in direct conflict with some of the most popular live-cell dyes.
Your first move is always to run your unstained control. This will show you exactly how much autofluorescence you're up against. If it's a significant problem, the best strategy is to sidestep it completely. Switch to dyes that fluoresce in less crowded parts of the spectrum, like the orange, red, or far-red channels.
Also, be aware of what’s in your media. Phenol red and riboflavin are major sources of background fluorescence. For really sensitive experiments where you need the cleanest signal possible, something as simple as switching to a phenol red-free medium for the final staining and imaging steps can make a massive difference.
For all your cell culture needs, from reliable reagents to high-quality, phenol red-free media that ensures a clean background for your live dead staining assays, trust PurMa Biologics. Explore our full range of solutions at https://www.purmabiologics.com.